苍穹外卖开发日志Day07——HttpClient、微信小程序开发及商品浏览功能
苍穹外卖开发日志Day07——HttpClient及微信小程序开发
2025.07.24
一、HttpClient
1.1 HttpClient简介
- HttpClient是Apache提供的一个开源的HTTP客户端库,用于发送HTTP请求和处理HTTP响应。它提供了一个简单的API来执行HTTP请求,支持多种HTTP方法(如GET、POST、PUT、DELETE等),并且可以处理Cookies、重定向、代理等功能。简言之就是通过编码的方式来发送HTTP请求。
- 核心API:
HttpClient:用于发送HTTP请求和接收响应。HttpClients:用于创建HttpClient实例。CloseableHttpClient:一个可关闭的HTTP客户端,用于发送请求和接收响应。HttpGet、HttpPost等:用于构建不同类型的HTTP请求。
- 发送请求步骤:
- 创建
HttpClient实例。 - 创建
Http请求对象(如HttpGet或HttpPost)。 - 调用HttpClient的
execute方法发送请求。
- 创建
1.2 HttpClient使用示例
- 导入依赖:(实际上AliyunOSS的SDK已经包含了HttpClient,所以不需要单独添加依赖)
1 | <dependency> |
- 发送GET请求示例:
1 |
|
-
测试结果:

出现问题的原因:Redis服务未启动 -
解决方法:启动Redis服务后再次测试

-
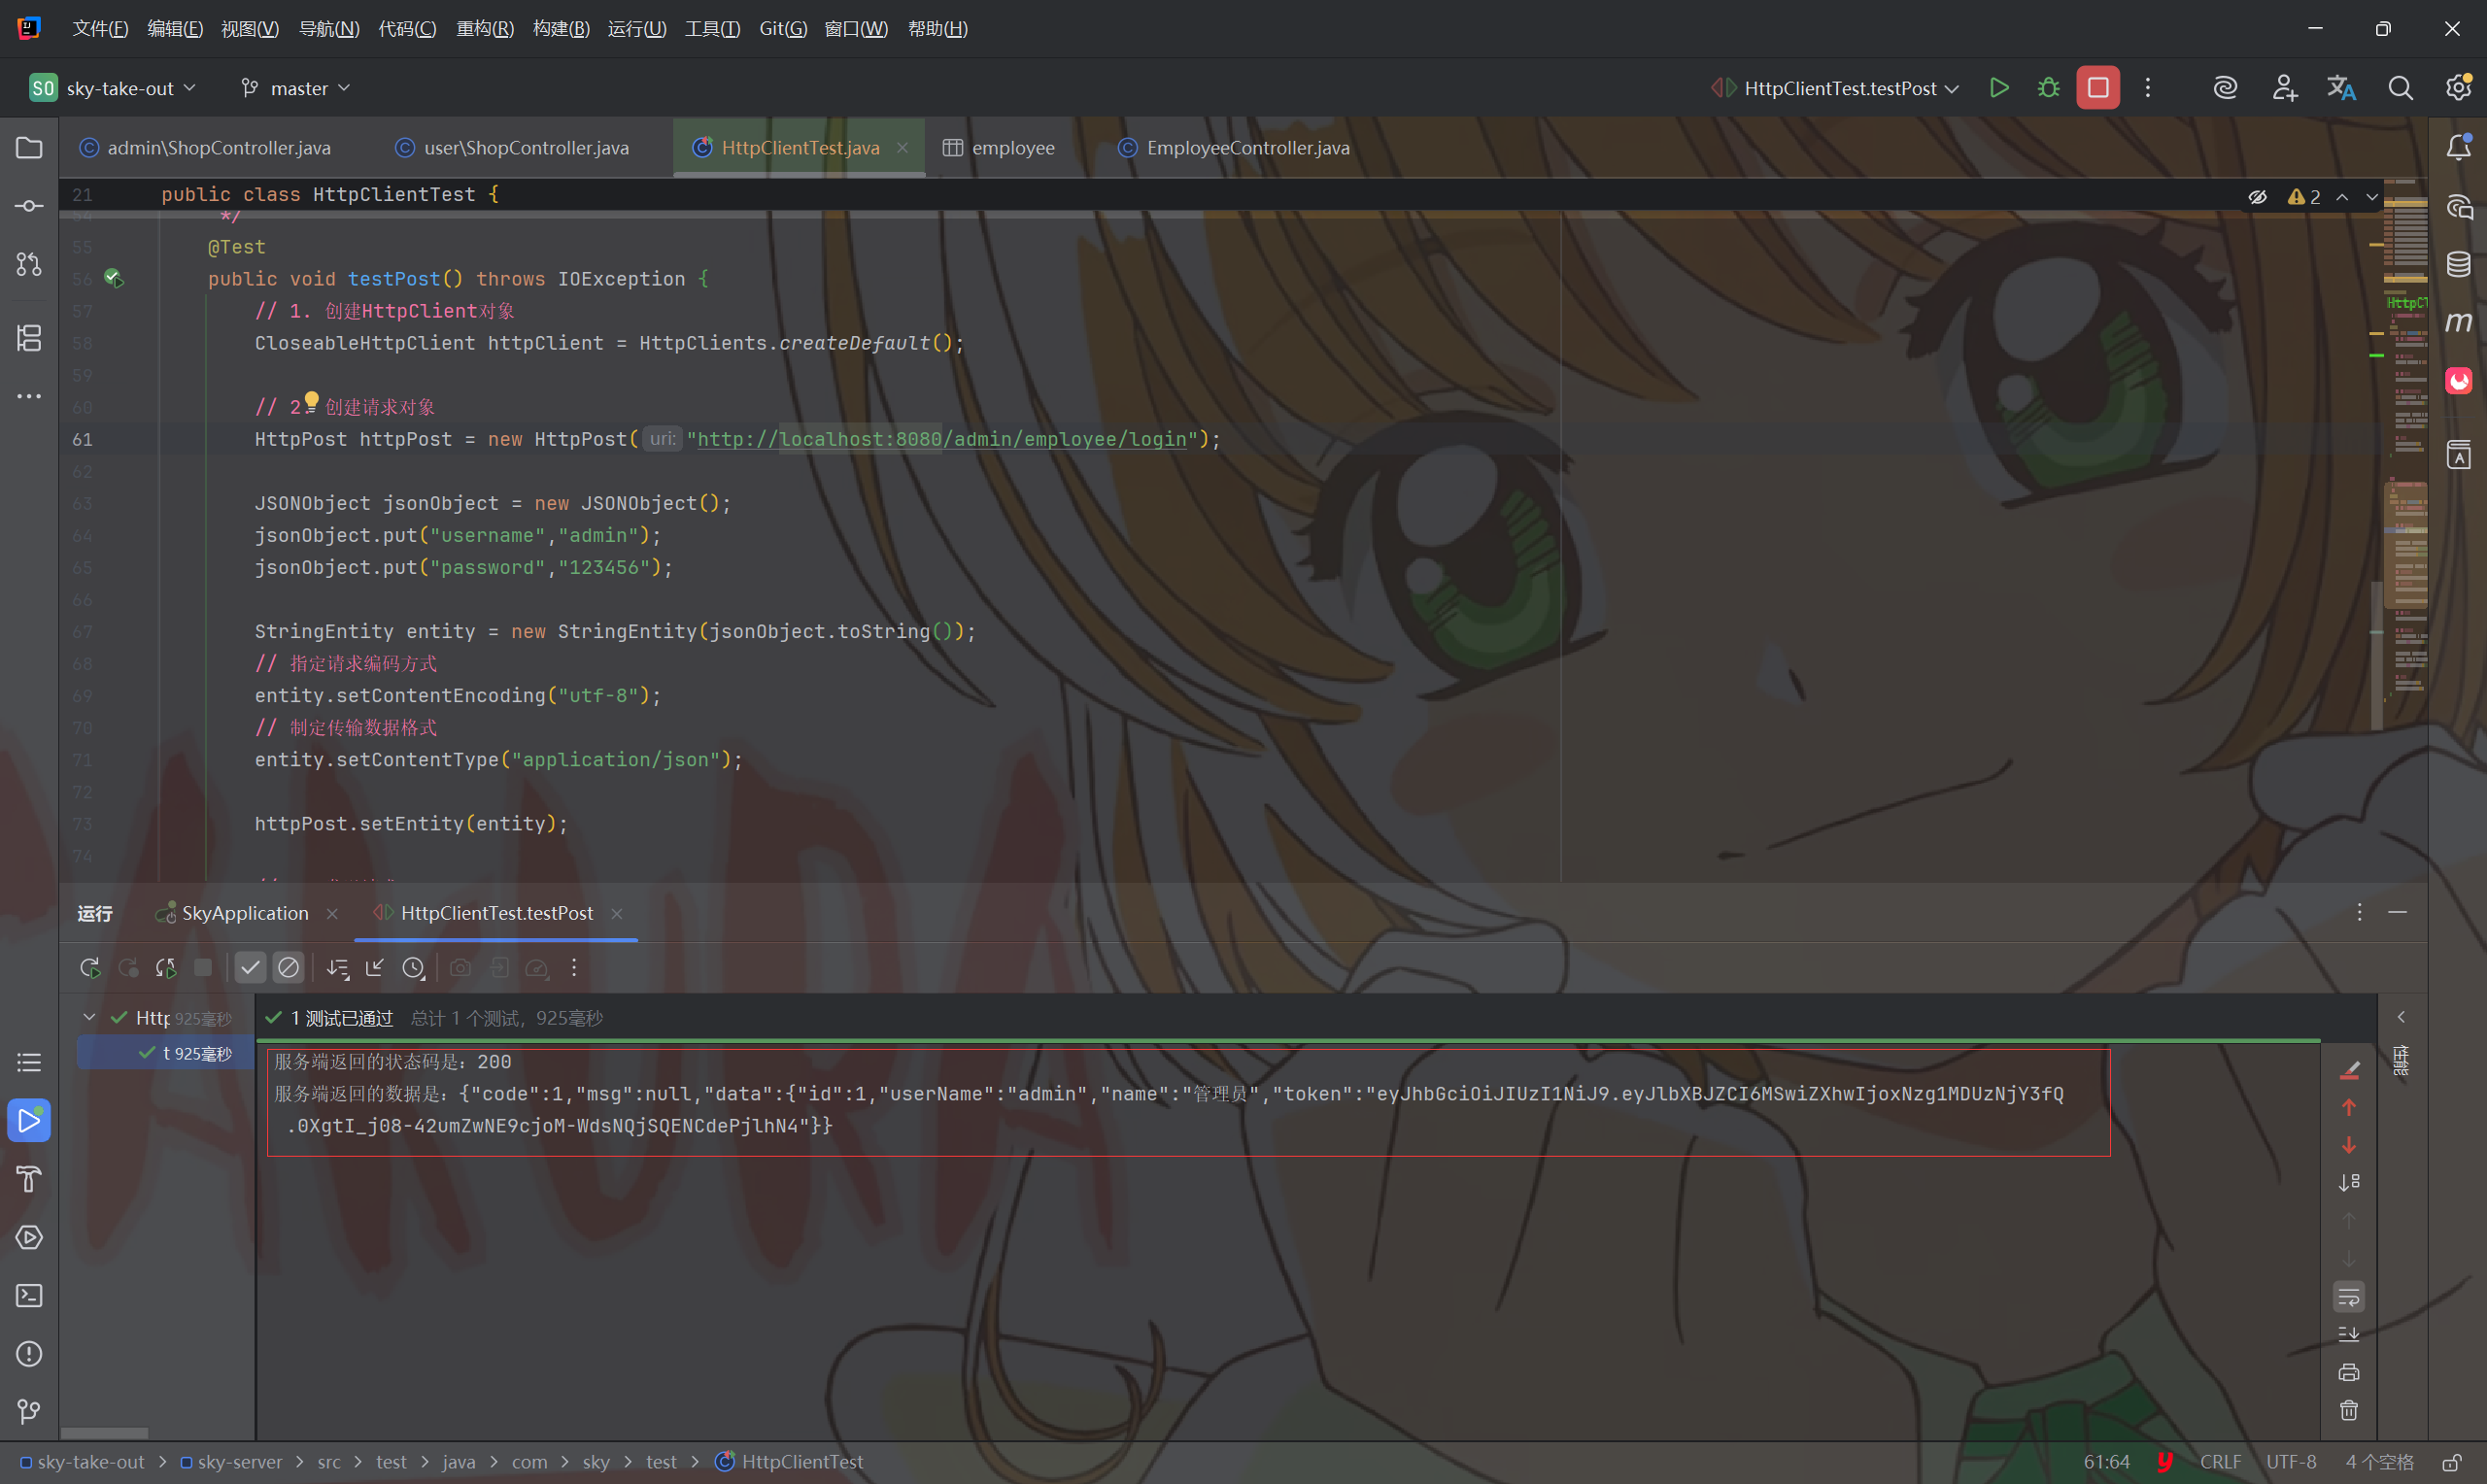
发送POST请求示例:
1 |
|
- 测试结果:
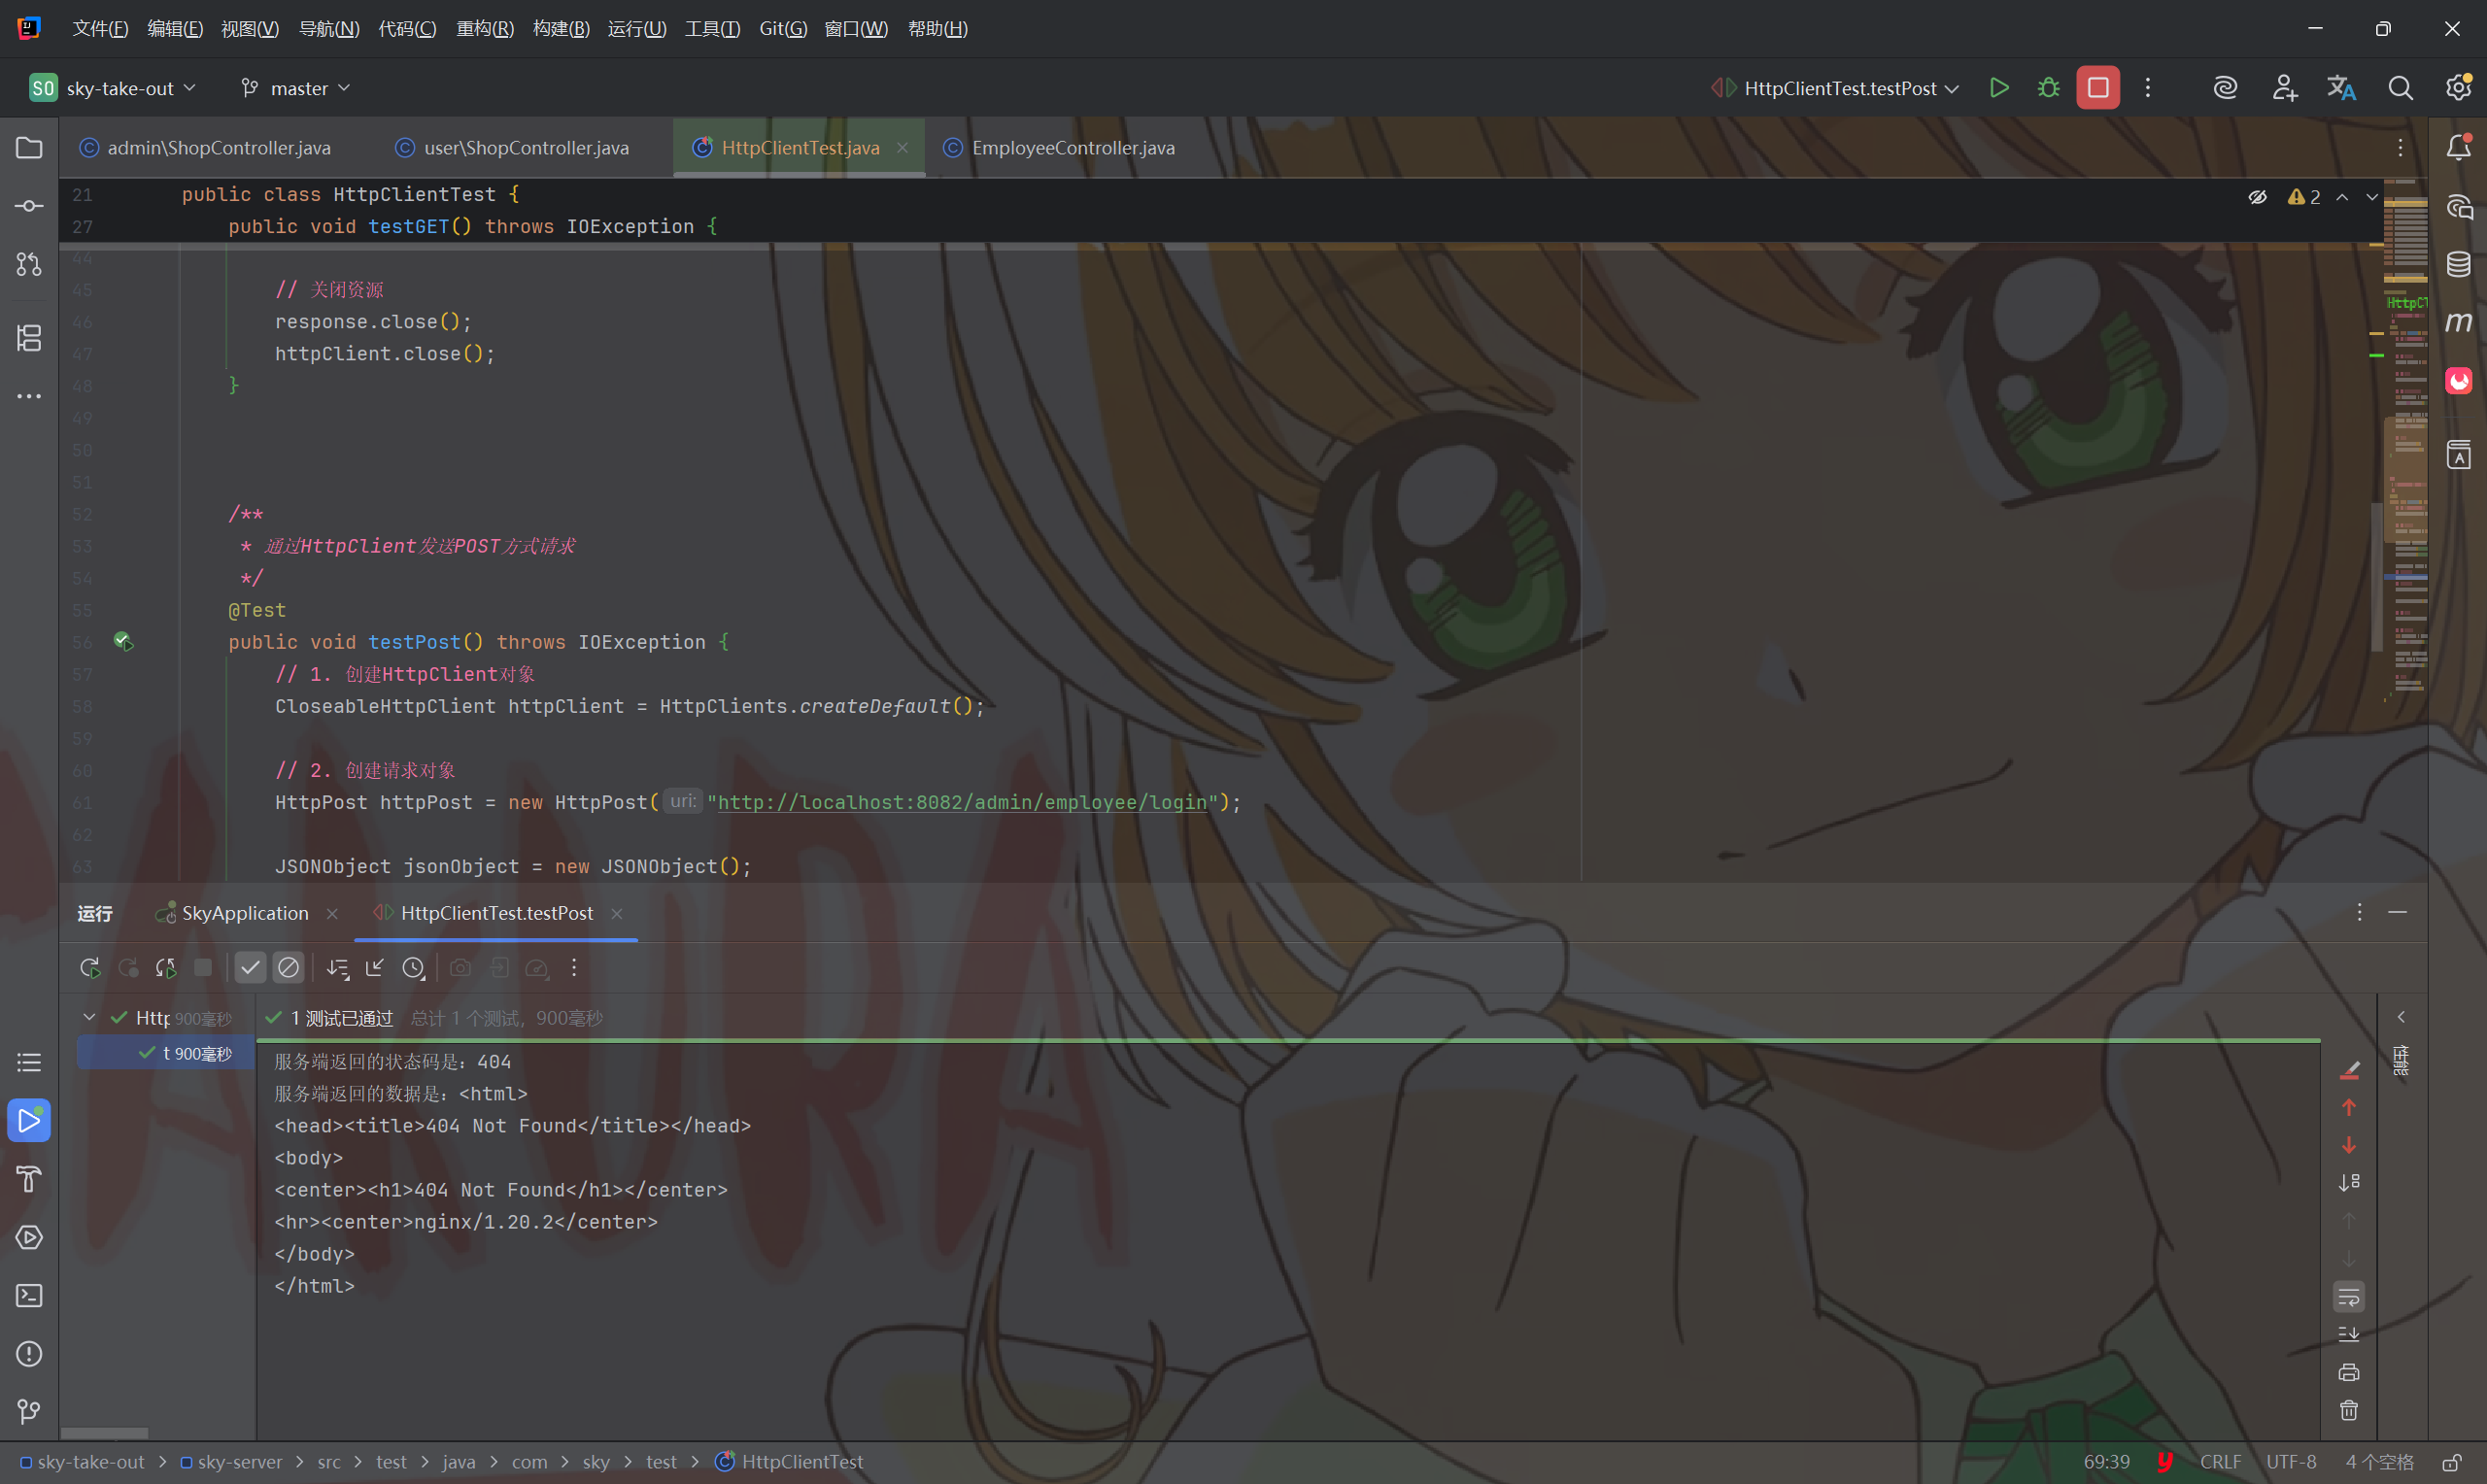
出现问题的原因:之前使用了反向代理单独设置了登陆端口为8080,而不是80821
2
3
4
5
6
7
8server {
listen 8082;
server_name localhost;
location /api/ {
proxy_pass http://localhost:8080/admin/; # 反向代理
}
} - 解决方法:修改端口号后再次测试
二、微信小程序开发
2.1 小程序简介
- 微信小程序是腾讯公司推出的一种轻量级应用,用户可以通过微信直接使用,无需下载安装。小程序具有快速加载、易于分享和使用等特点,适用于各种场景,如电商、社交、工具等。
- 微信小程序公众平台:https://mp.weixin.qq.com/cgi-bin/wx?token=&lang=zh_CN
- 开放注册范围:个人、企业、政府、媒体等均可注册小程序。
- 开发支持:
- 开发文档
- 开发者工具
- 设计指南
- 小程序体现DEMO
- 接入流程:
- 注册:在微信公众平台注册小程序账号,完成注册后可以同步进行信息完善和开发
- 小程序信息完善:填写小程序基本信息,包括名称、头像、介绍及服务范围等
- 开发小程序:完成小程序开发者绑定,开发信息配置后,开发者可下载开发工具、参考开发文档进行小程序的开发和测试
- 提交审核和发布:完成小程序开发后,提交代码至微信团队审核,审核通过后即可发布(公测期间不能发布)
2.2 准备工作
- 准备工作
- 注册小程序
- 完善小程序信息
- 下载开发者工具
- 注册地址:https://mp.weixin.qq.com/wxopen/waregister?action=step1
- 下载开发者工具
2.3 入门案例
-
操作步骤
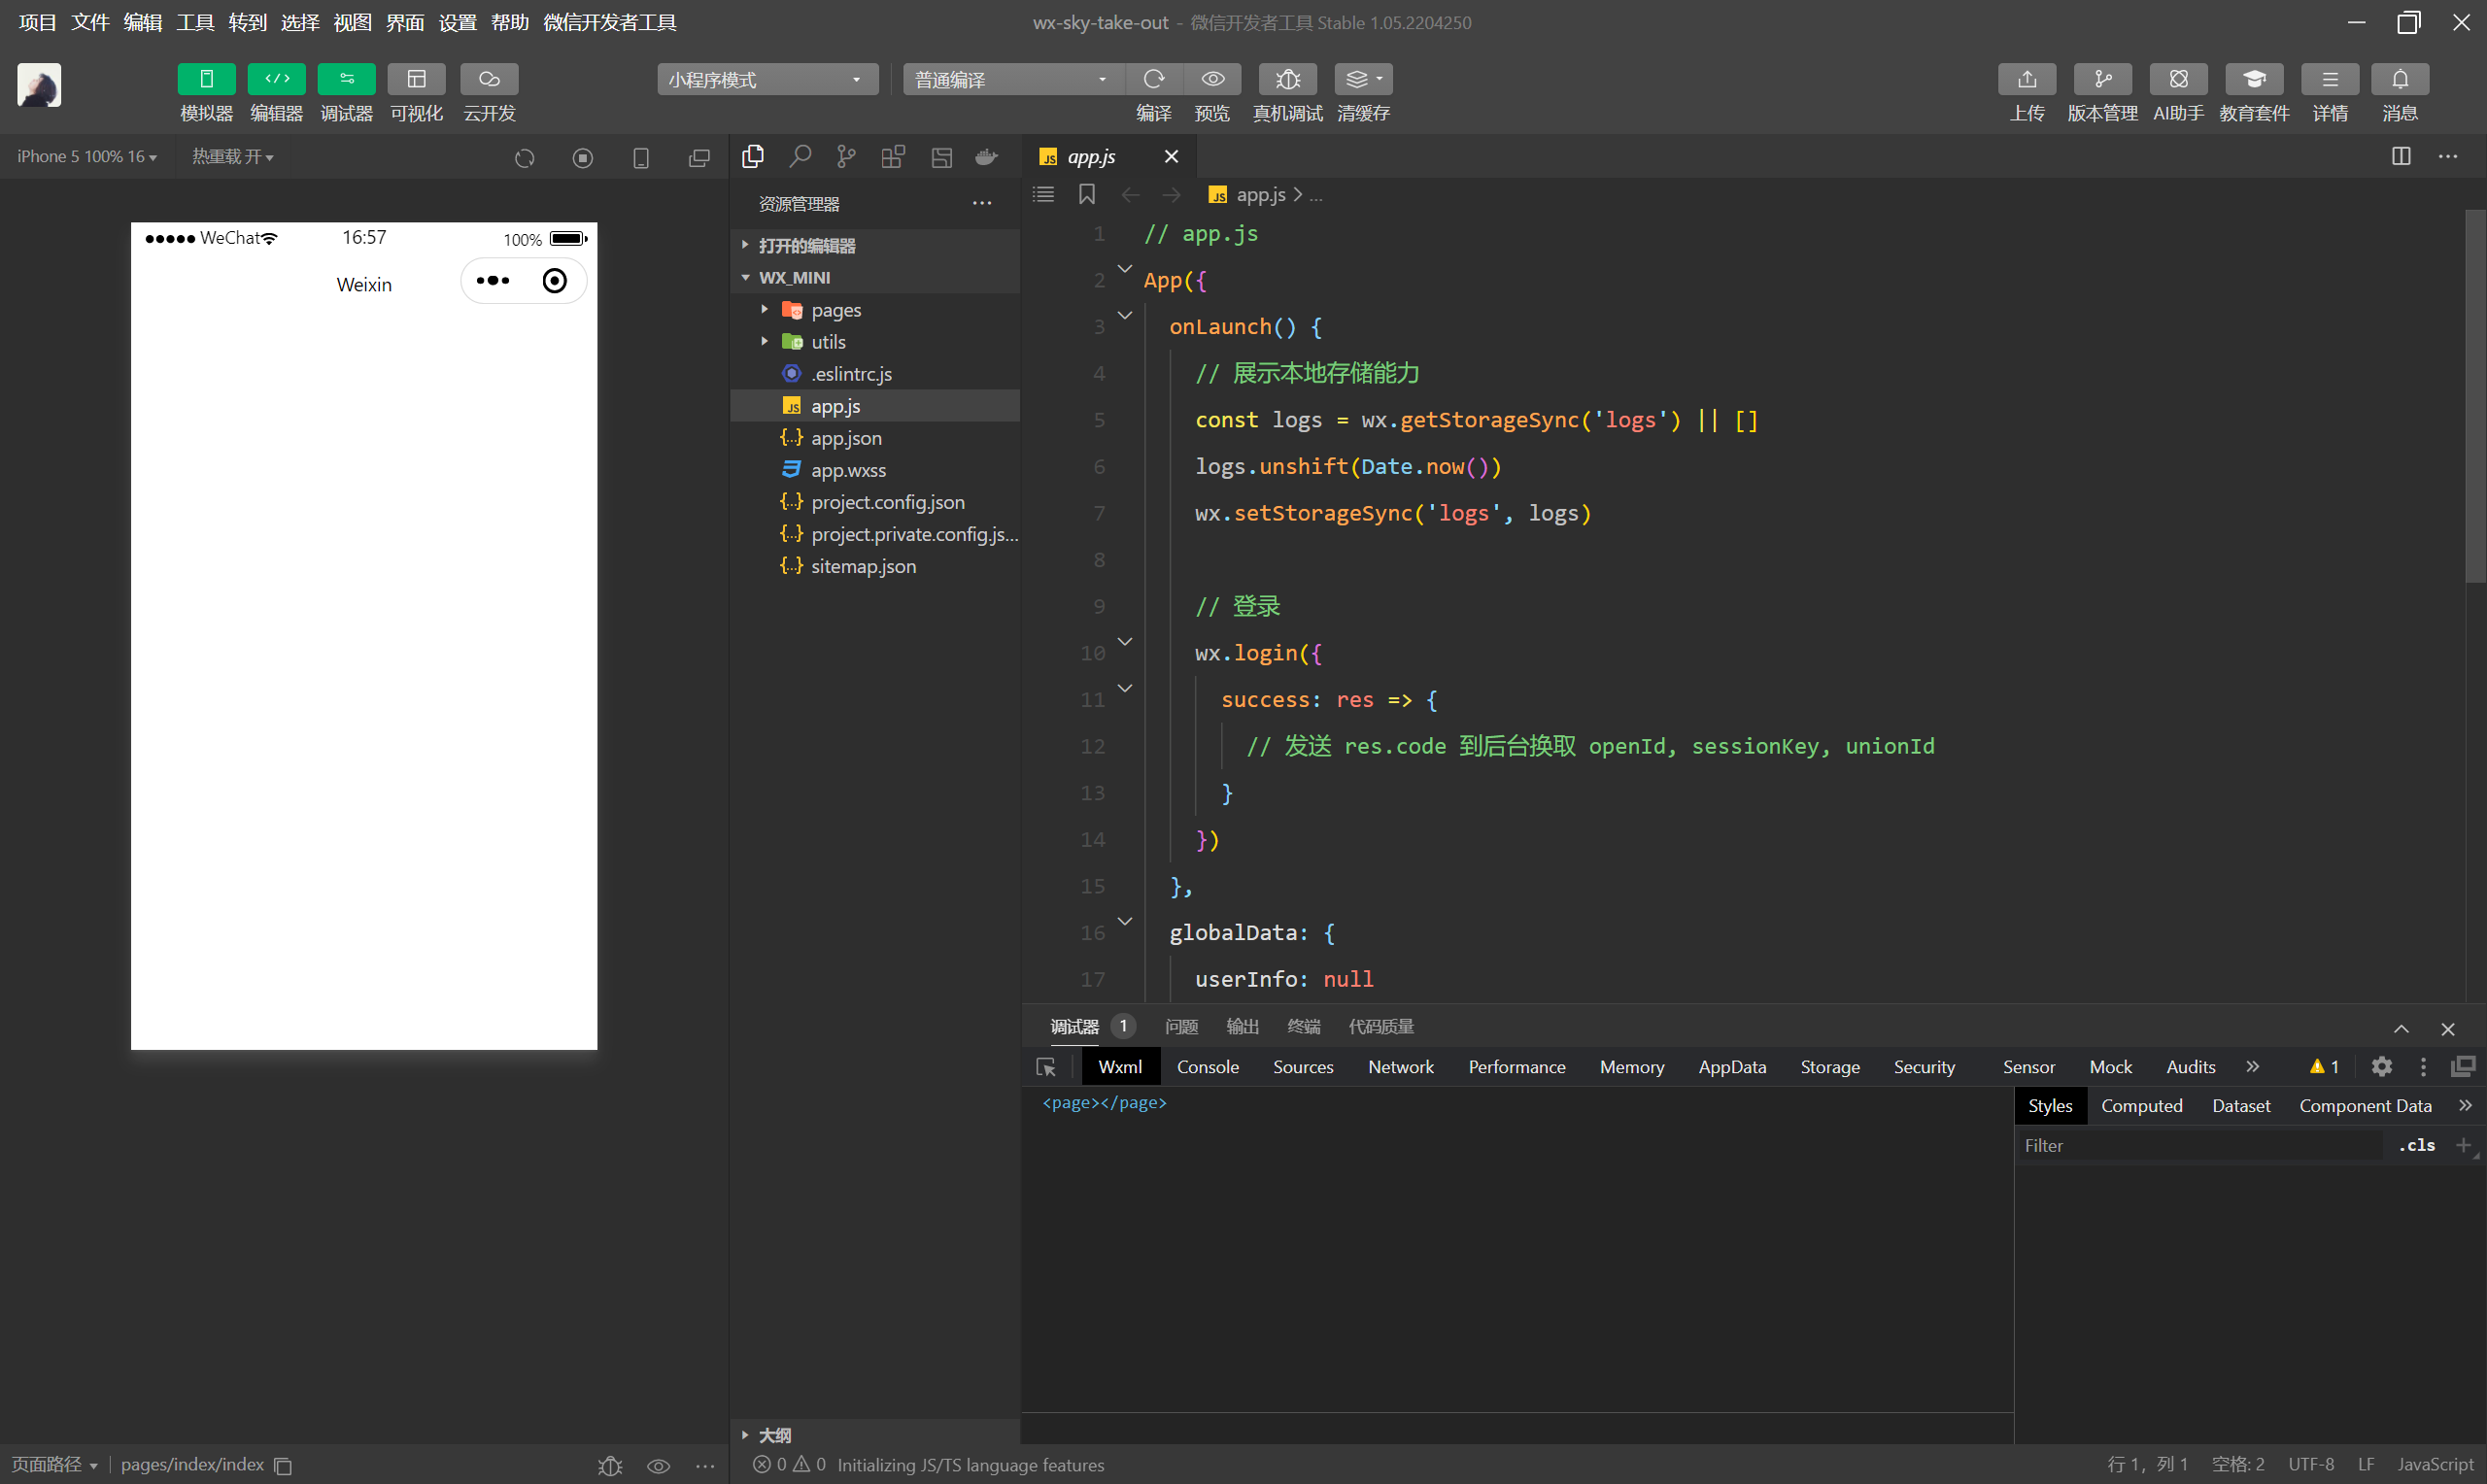
- 了解小程序目录结构
- 编写小程序代码
- 编译小程序
-
小程序目录结构
- 小程序包含一个描述整体程序的app和多个描述各自页面的page。一个小程序主体部分由三个文件组成,必须放在项目的根目录,如下:
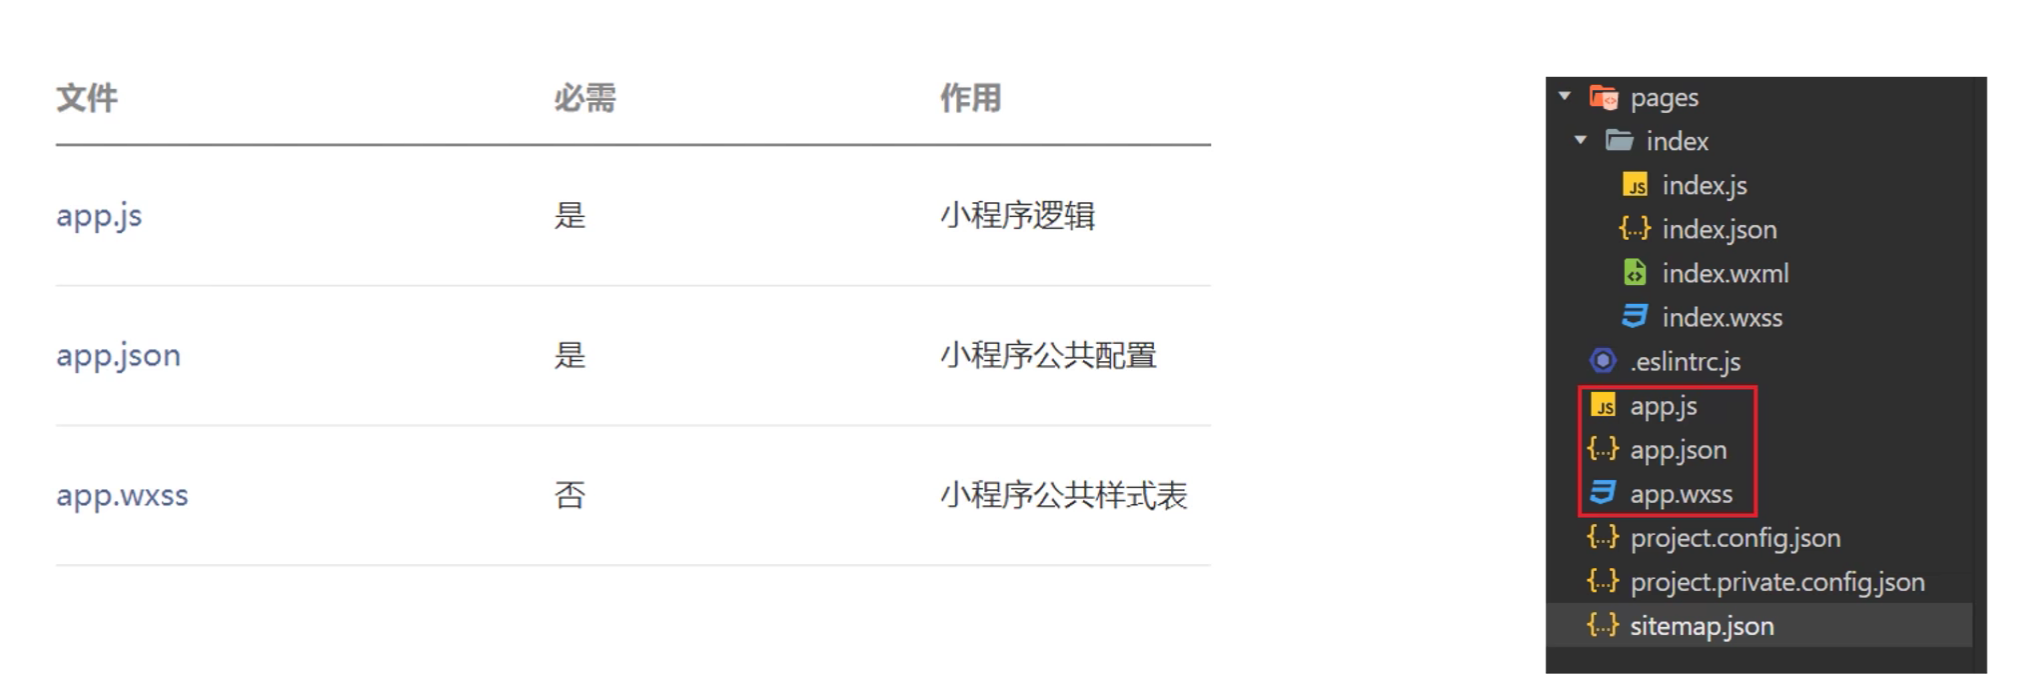
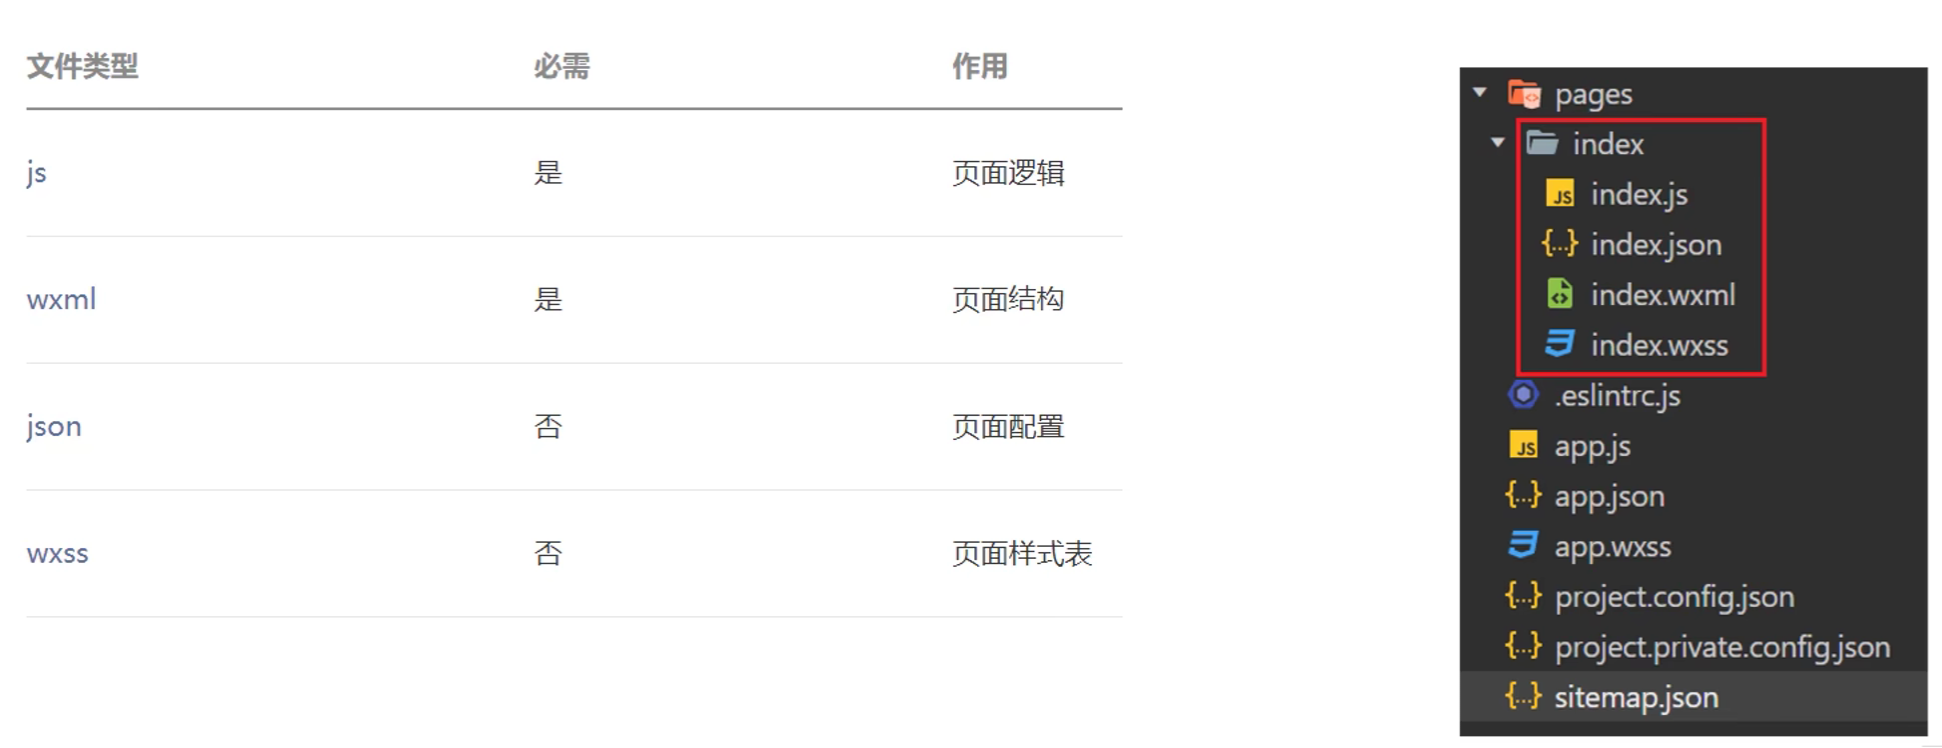
- 一个小程序页面由四个文件组成:
- 小程序包含一个描述整体程序的app和多个描述各自页面的page。一个小程序主体部分由三个文件组成,必须放在项目的根目录,如下:
三、微信登录
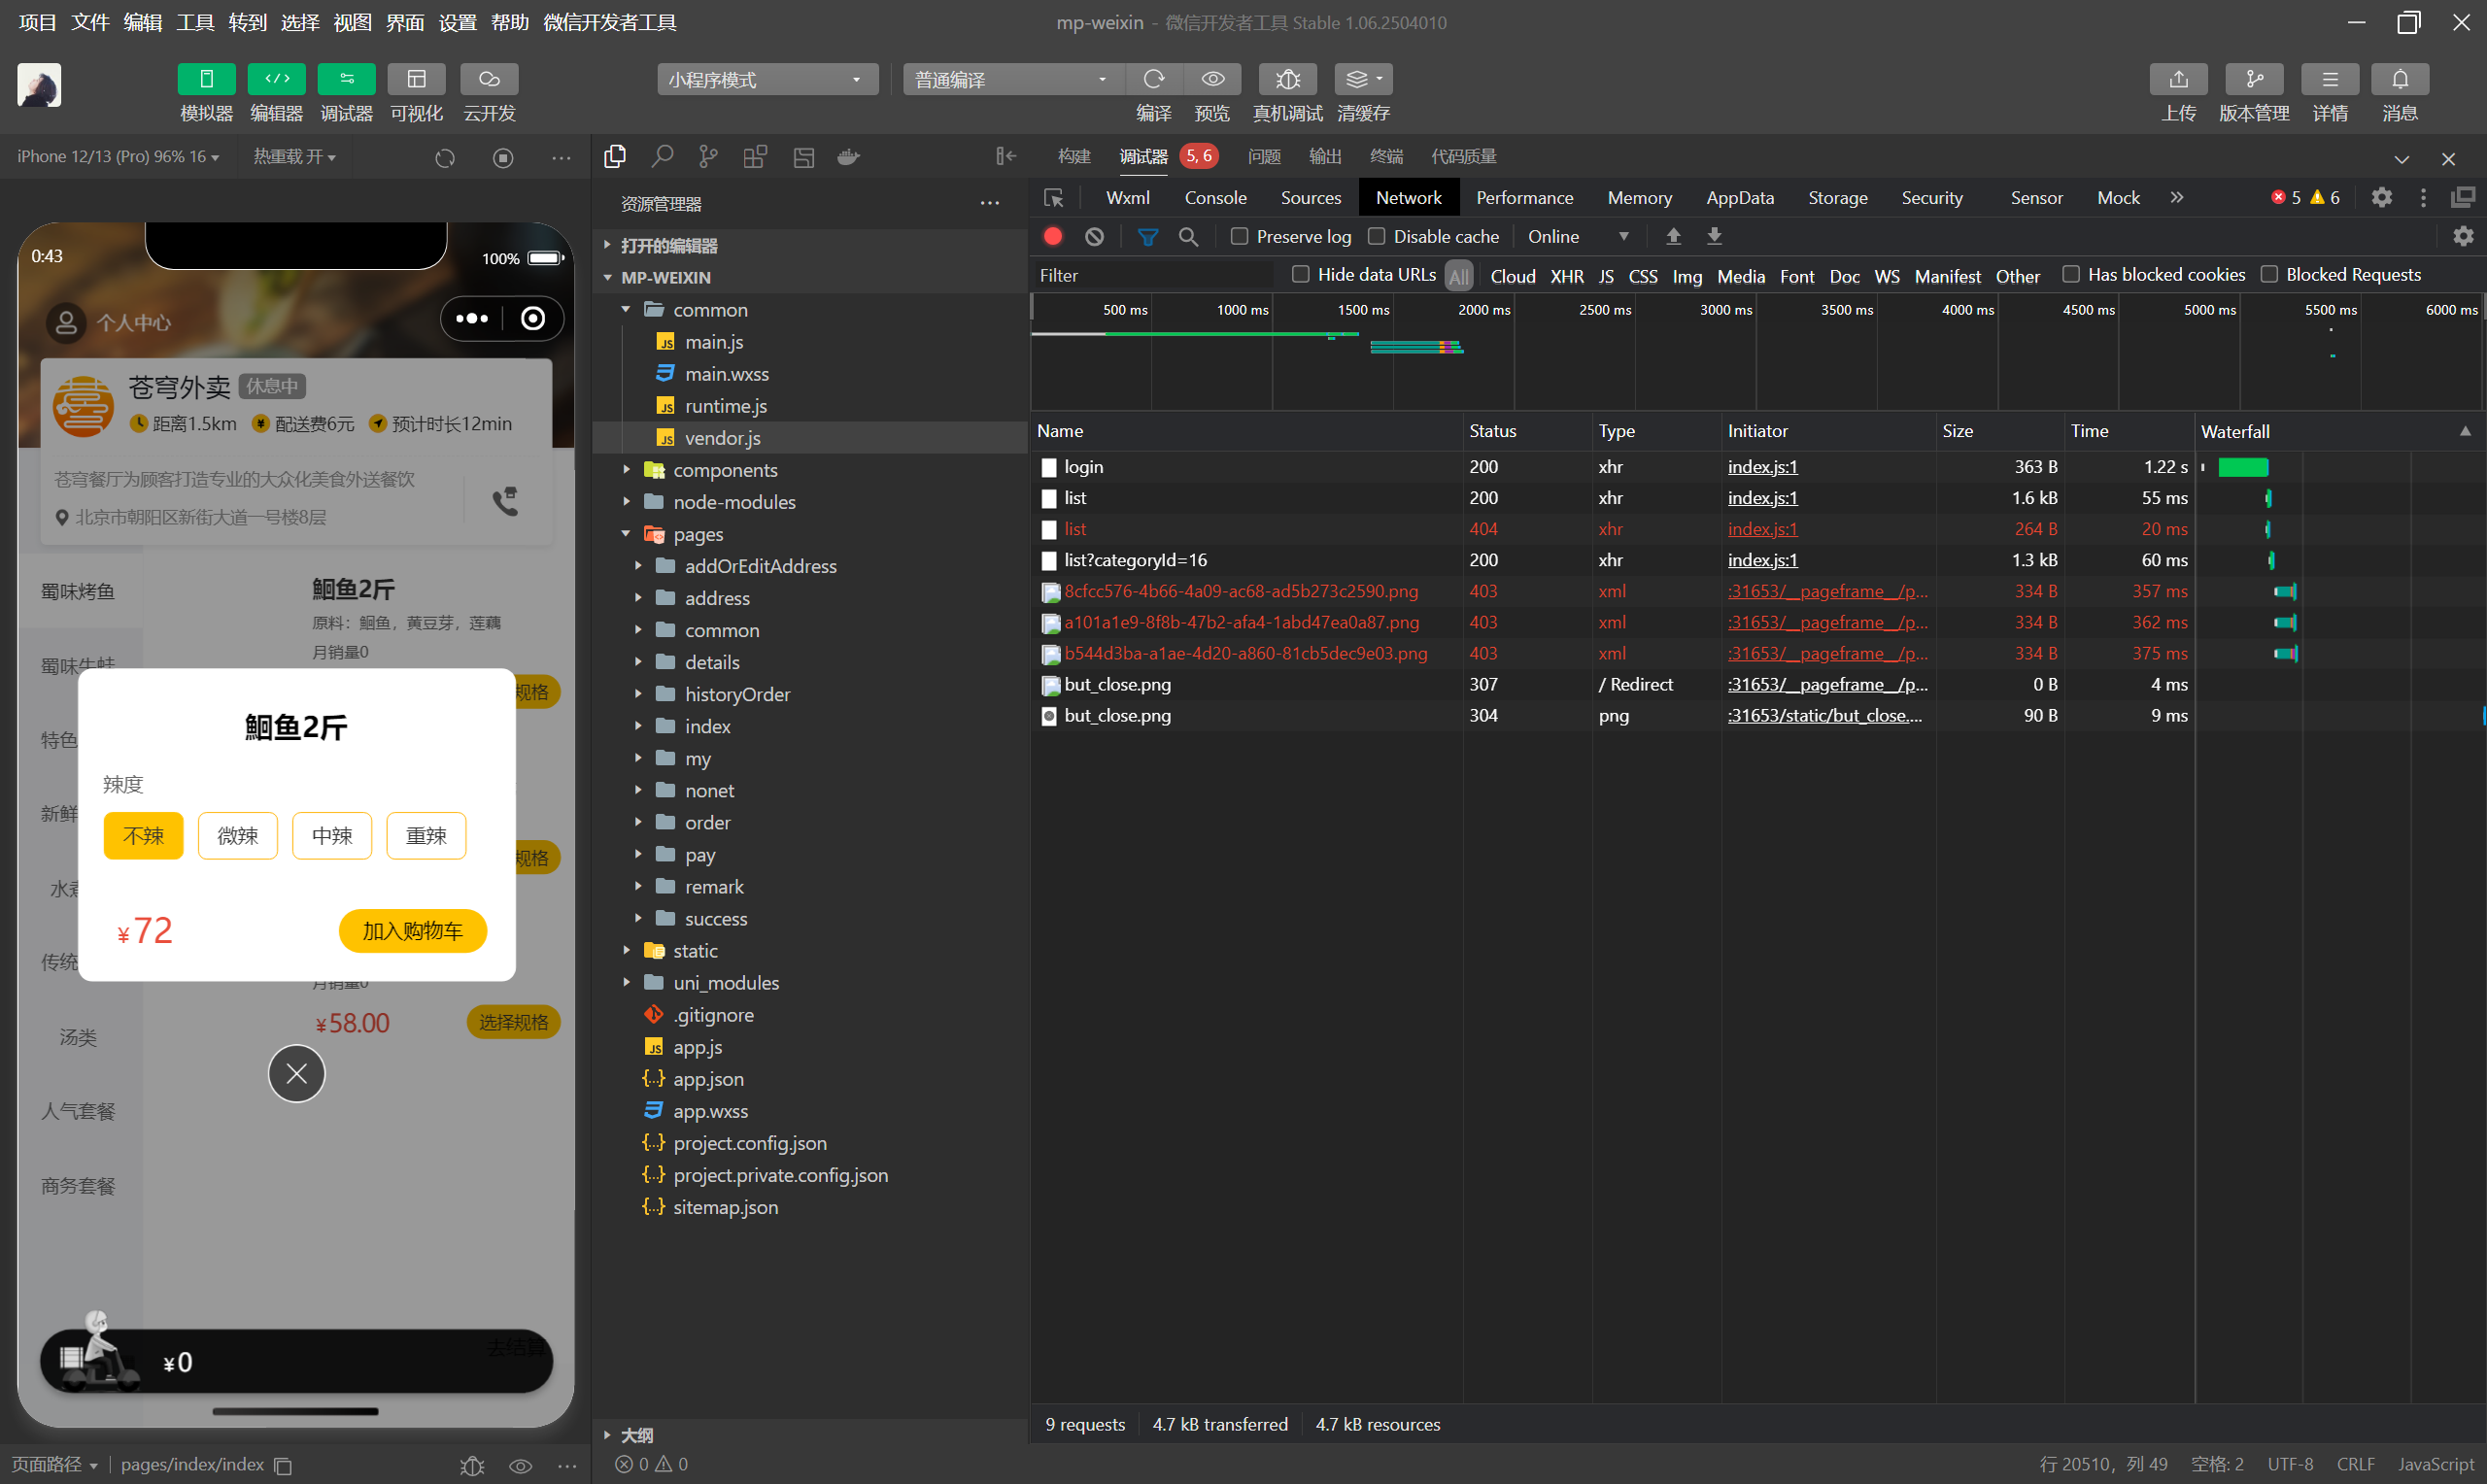
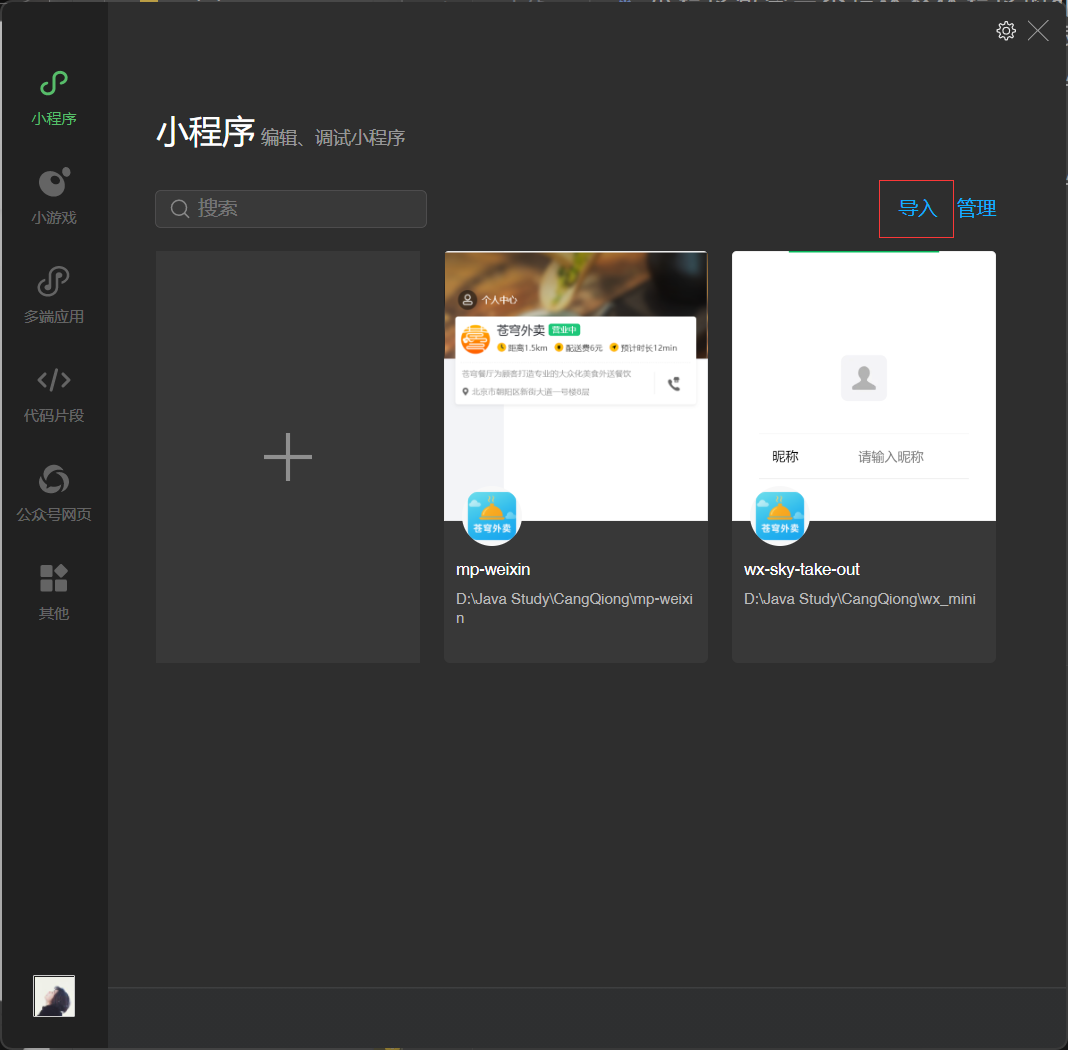
3.1 导入小程序
- 导入小程序:
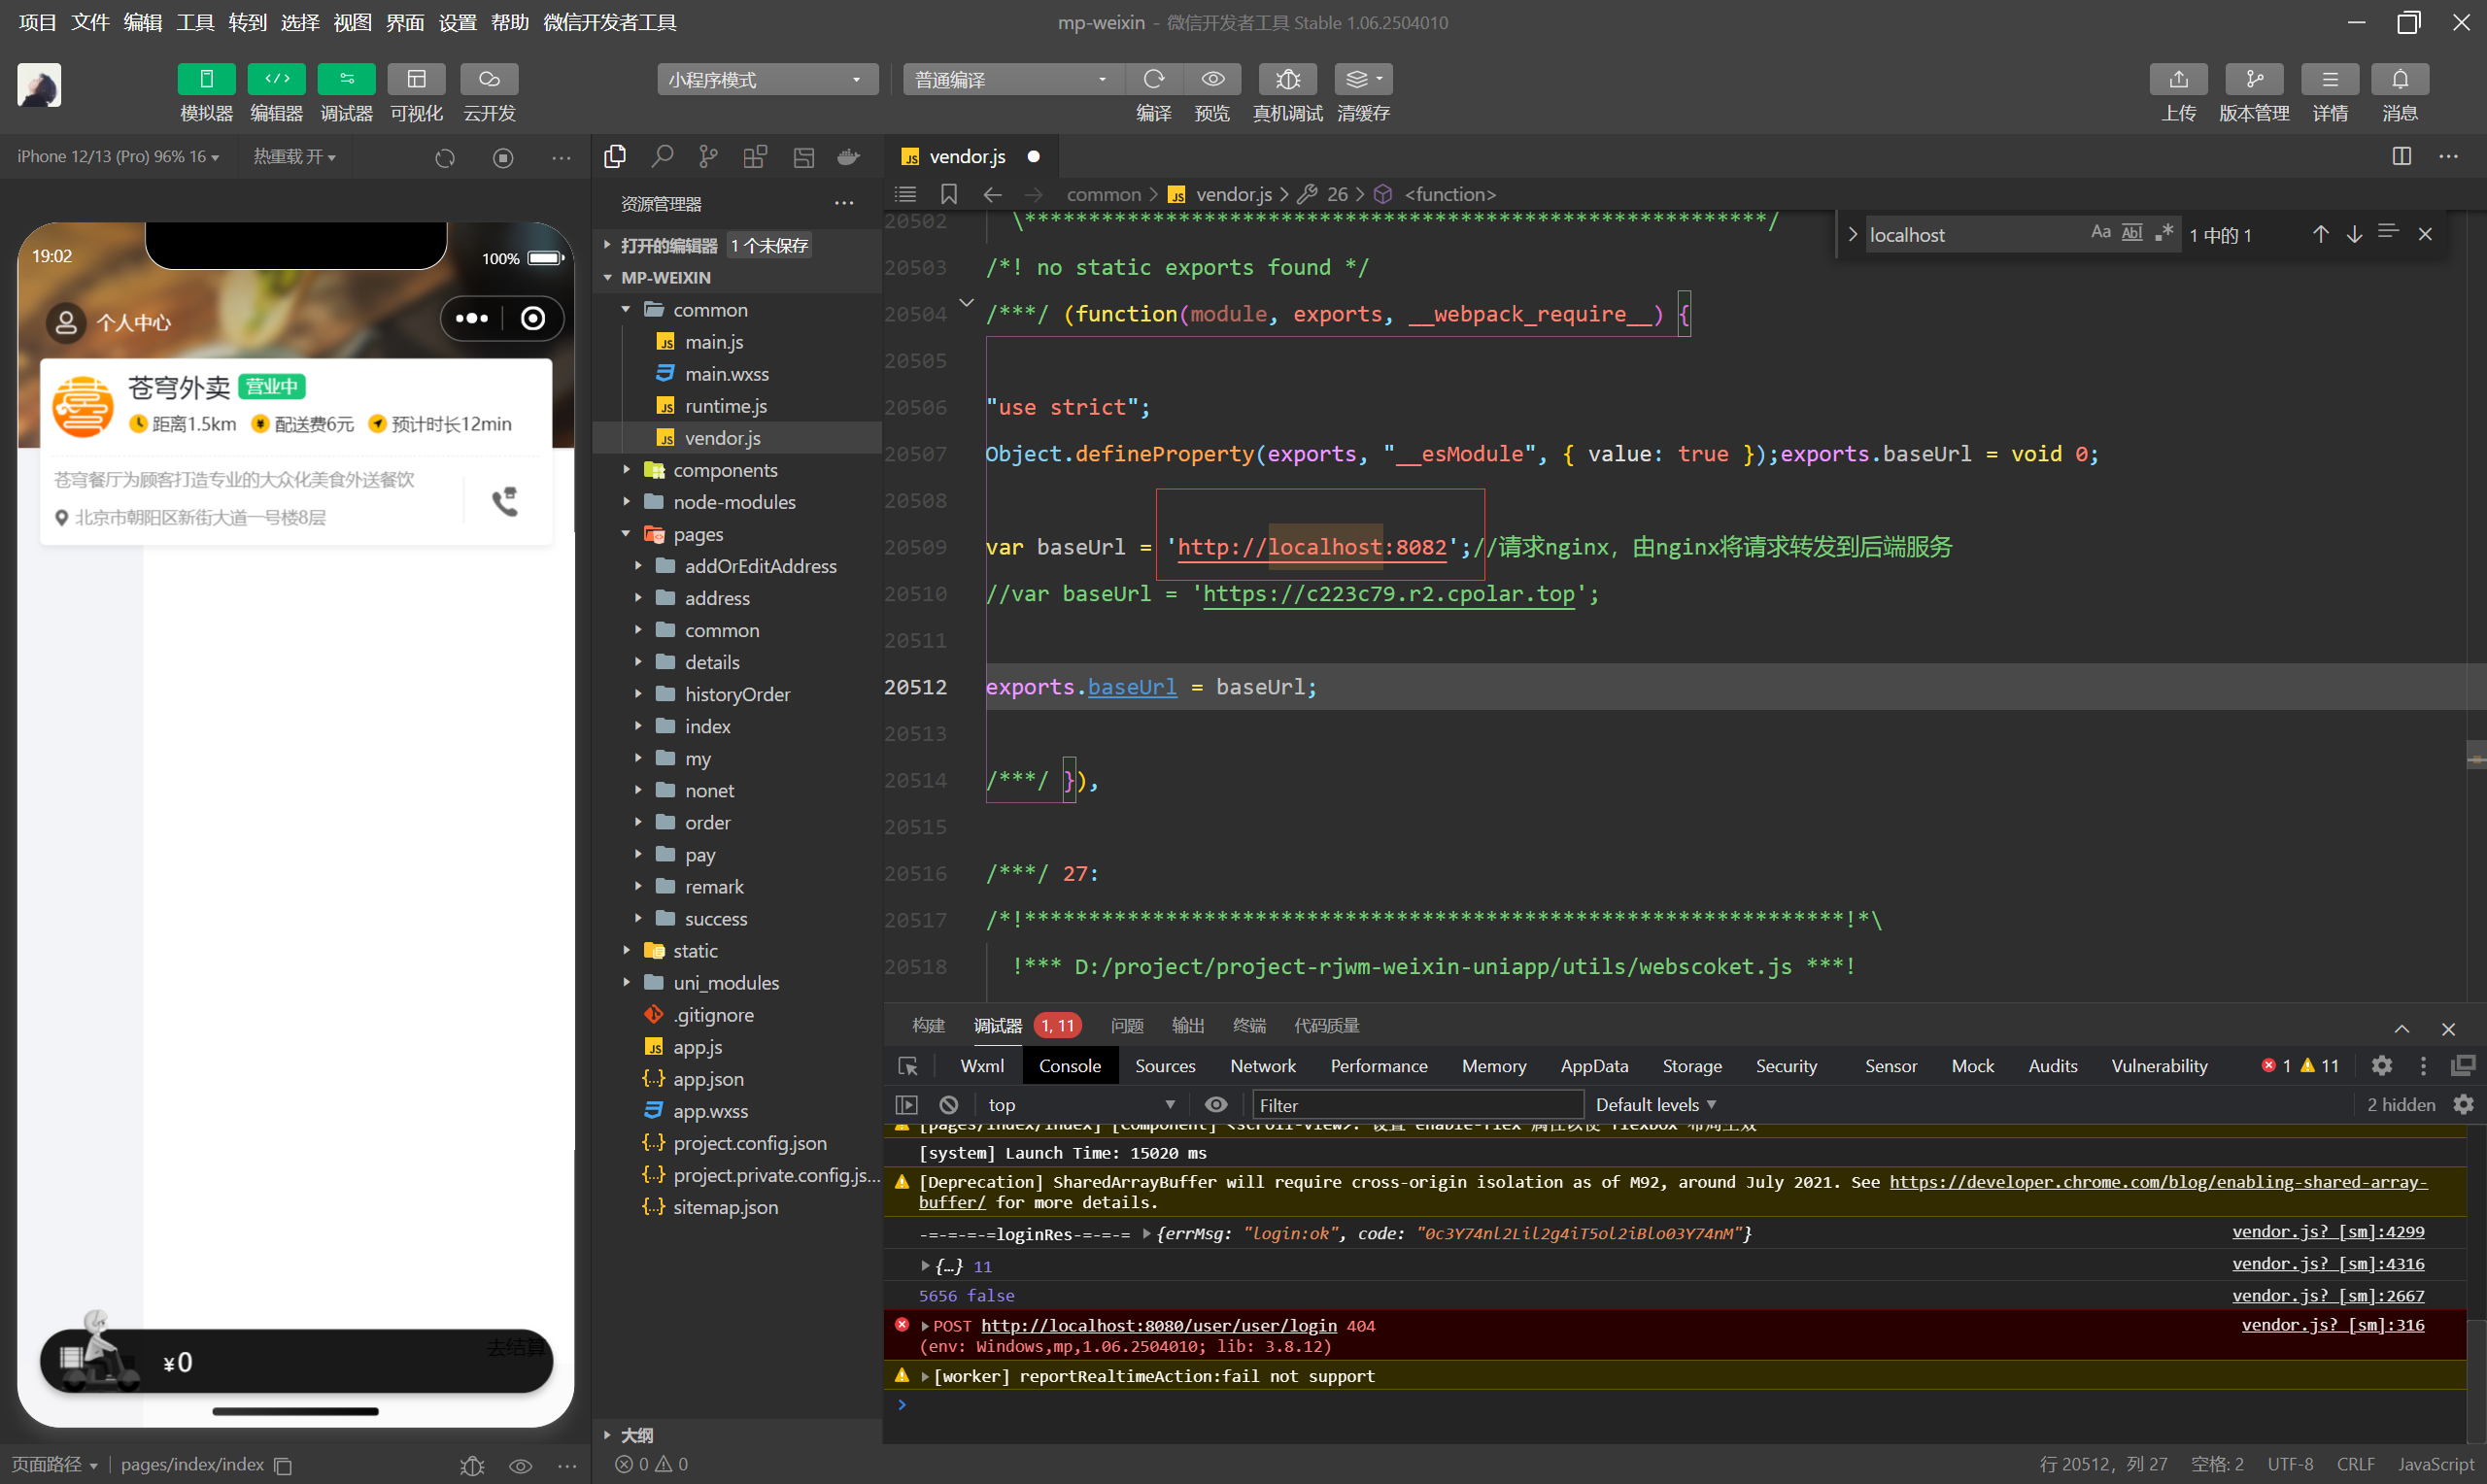
- 更改端口号:修改common/vendor.js文件中的端口号为8082
3.2 微信登录流程
- 微信登录流程:
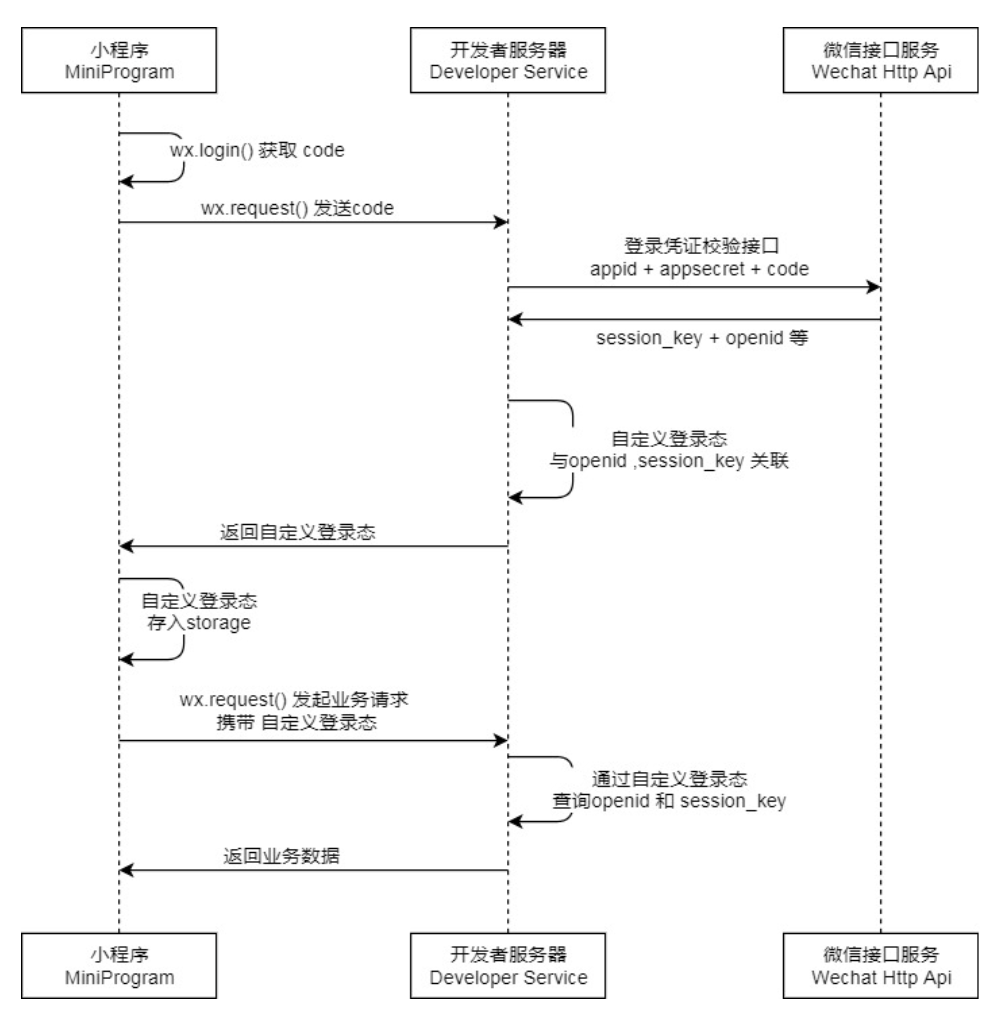
- 说明:
- 调用wx.login()获取 临时登录凭证code ,并回传到开发者服务器。
- 调用auth.code2Session接口,换取 用户唯一标识 OpenID、用户在微信开放平台账号下的唯一标识UnionID(若当前小程序已绑定到微信开放平台账号)和会话密钥 session_key。
之后开发者服务器可以根据用户标识来生成自定义登录态,用于后续业务逻辑中前后端交互时识别用户身份。
- 注意事项:
- 会话密钥session_key是对用户数据进行 加密签名 的密钥。为了应用自身的数据安全,开发者服务器不应该把会话密钥下发到小程序,也不应该对外提供这个密钥。
- 临时登录凭证code只能使用一次
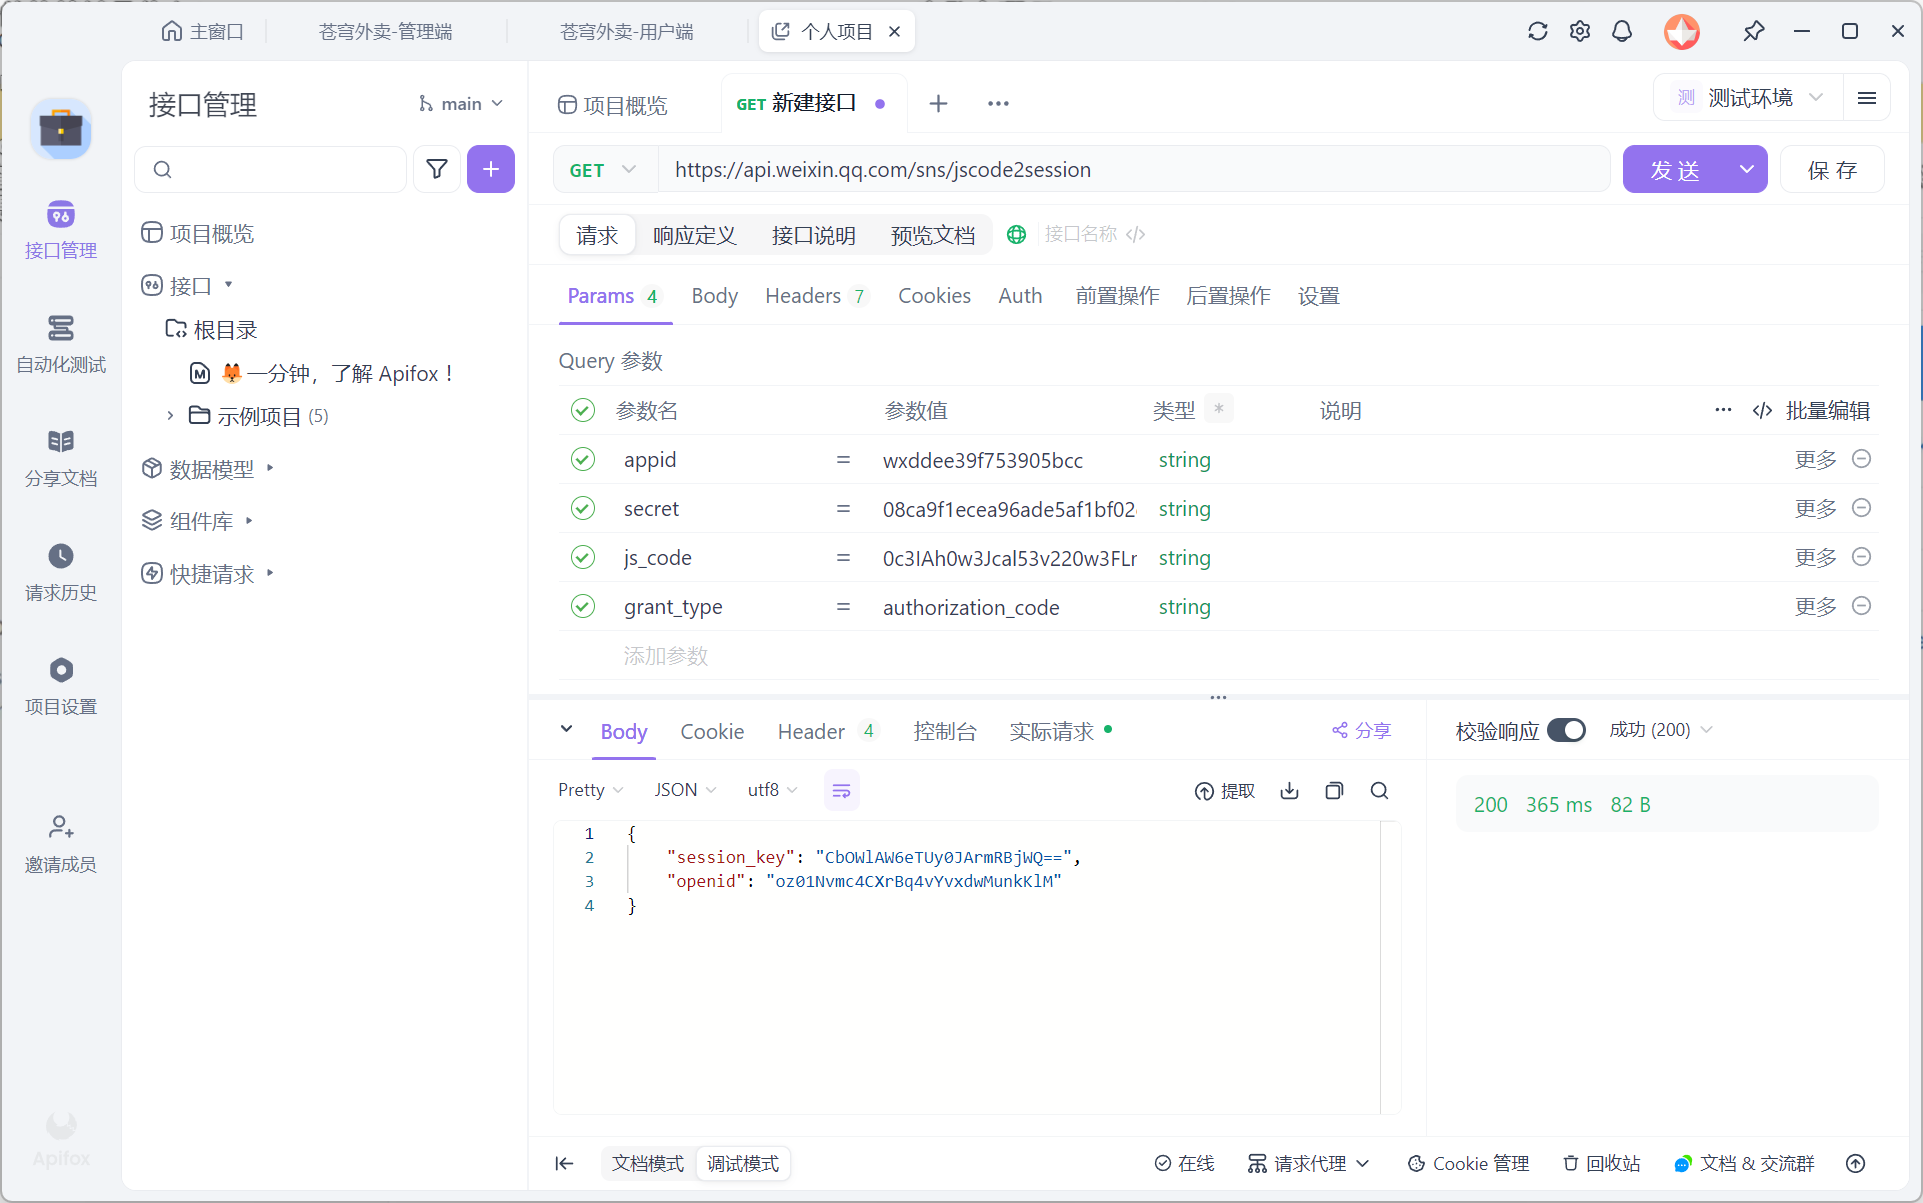
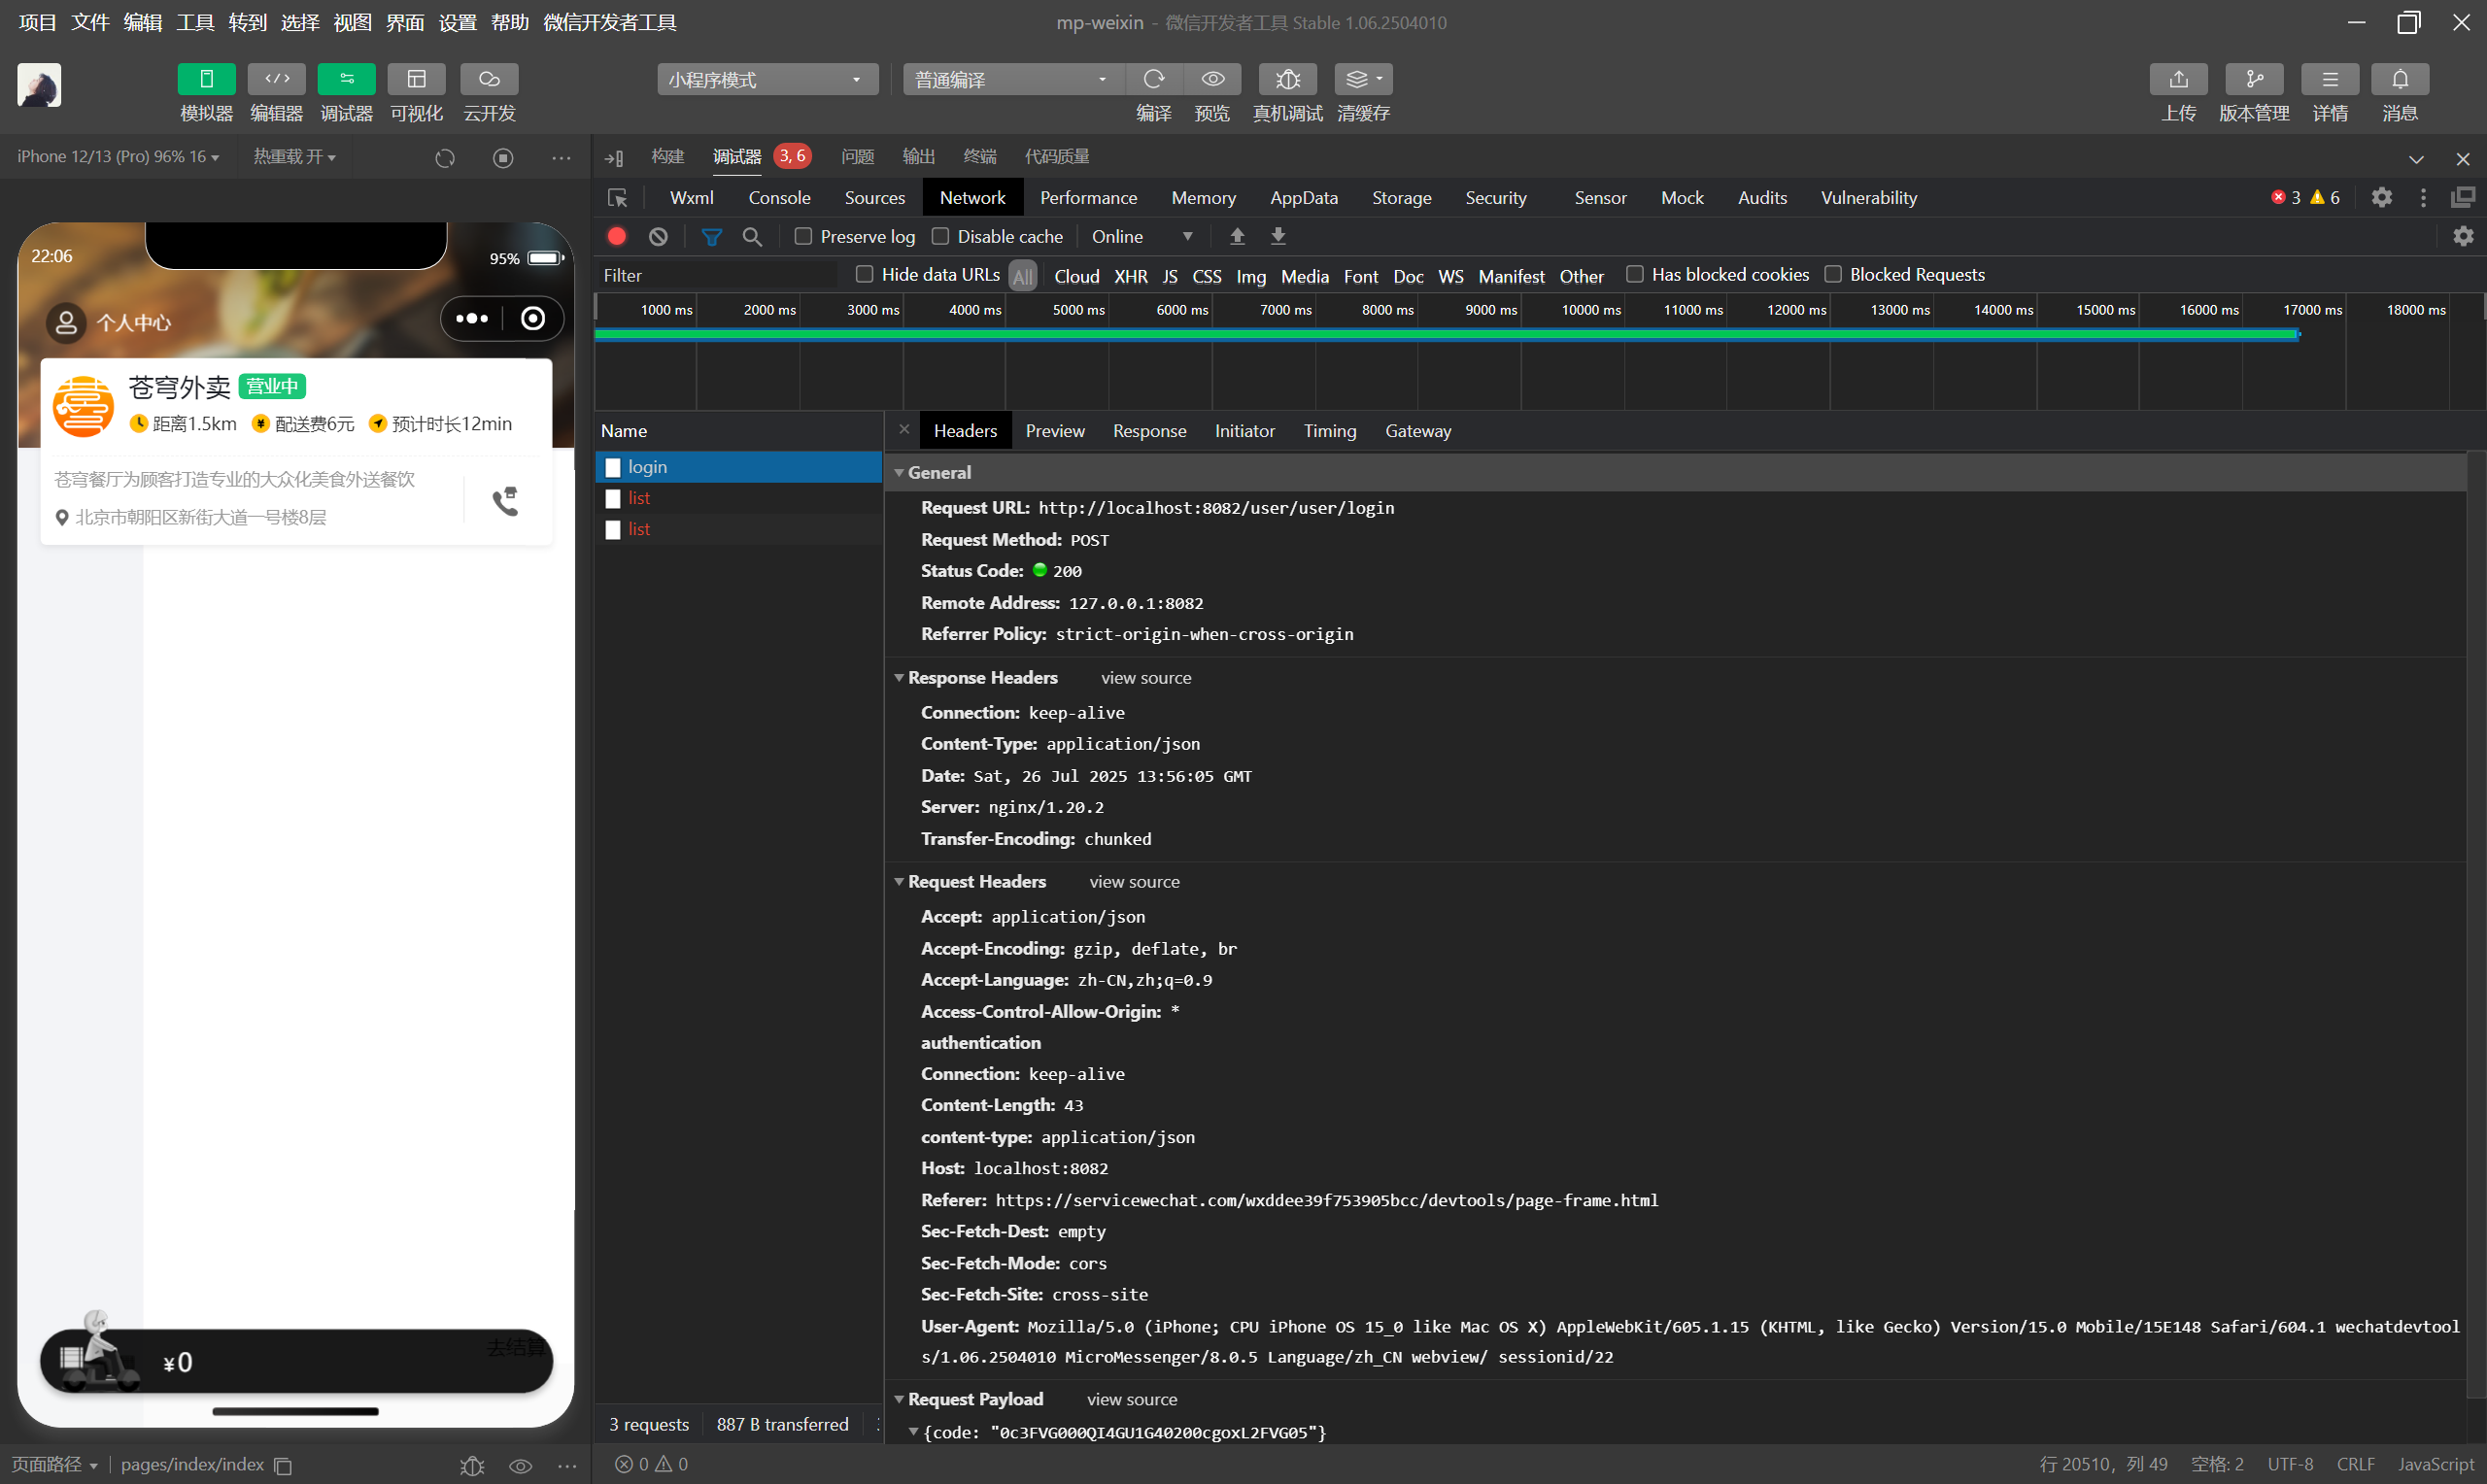
- 登录测试:
3.3 需求分析和设计
- 产品原型
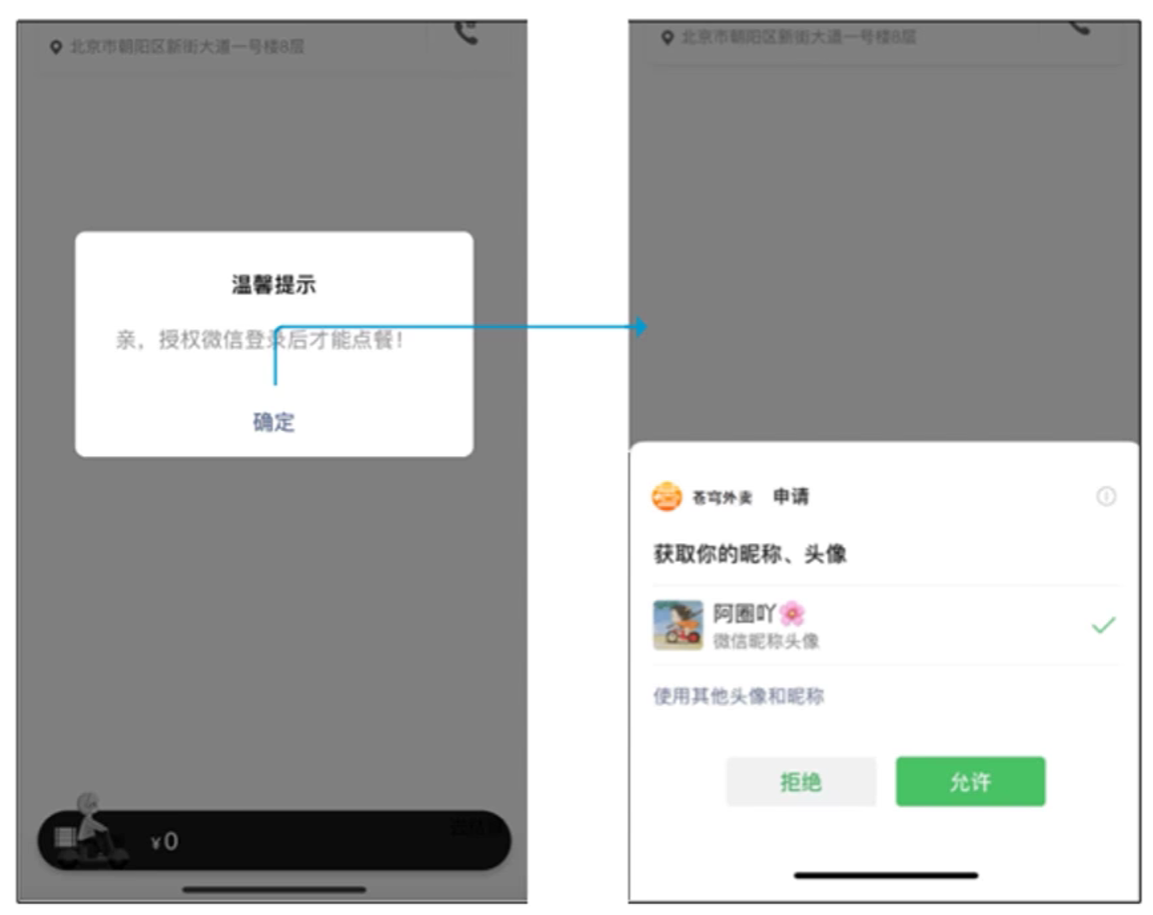
- 业务规则
- 基于微信登录实现小程序的登录功能
- 如果是新用户需要自动完成注册
- 接口设计
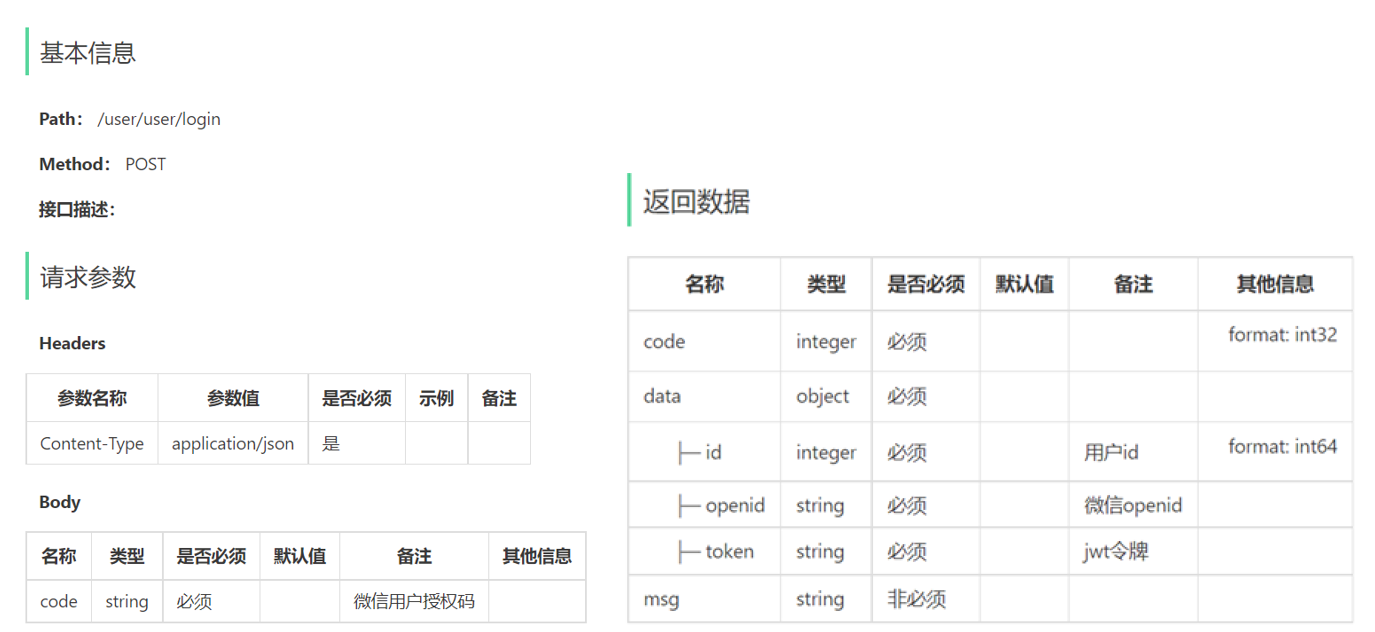
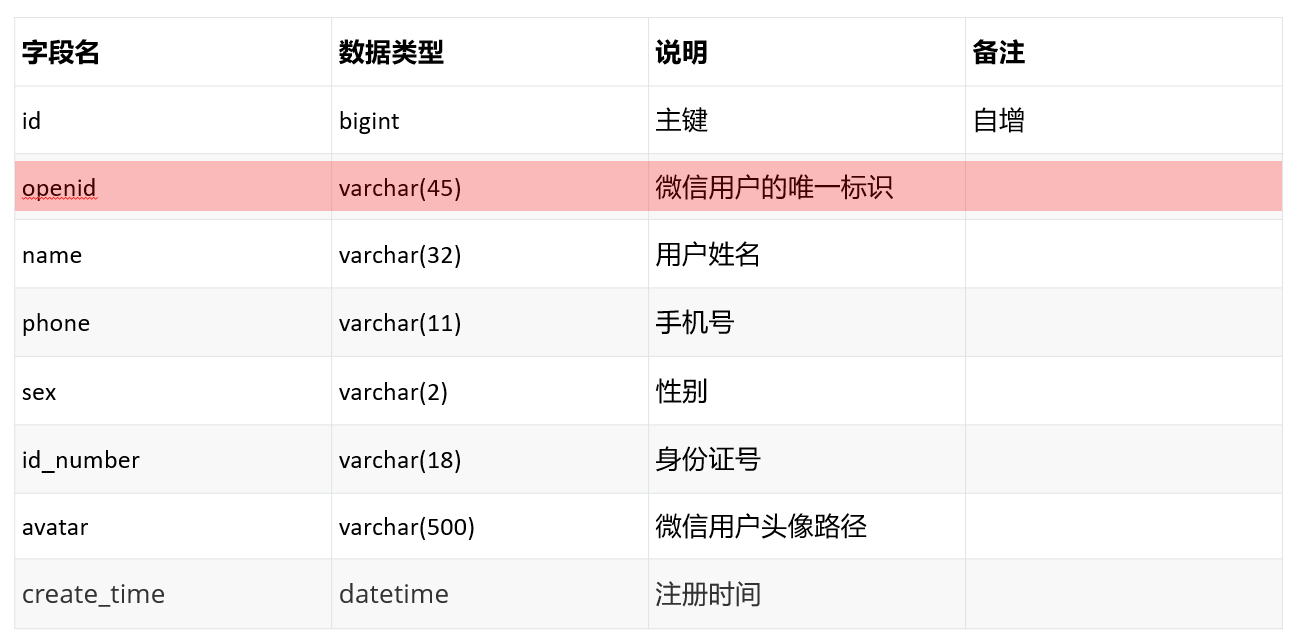
- 数据库设计(user表):
3.4 代码开发
- 配置配置项:
1
2
3
4
5
6
7
8
9
10
11
12<!-- 配置微信登录所需配置项 -->
sky:
wechat:
appid: ${sky.wechat.appid}
secret: ${sky.wechat.secret}
<!-- 配置为微信用户生成jwt令牌时使用的配置项 -->
sky:
jwt:
user-secrt-key: itheima
user-ttl: 7200000
user-token-name: authentication
3.4.1 UserController
1 |
|
3.4.2 UserService
1 | public interface UserService { |
3.4.3 UserServiceImpl
1 |
|
3.4.4 UserMapper
1 |
|
3.4.5 UserMapper.xml
1 |
|
3.4.6 JwtTokenUserInterceptor
1 | /** |
3.4.7 WebMvcConfiguration
1 | /** |
3.5 功能测试
- 测试微信登录功能:
四、商品浏览
4.1 商品浏览——功能开发
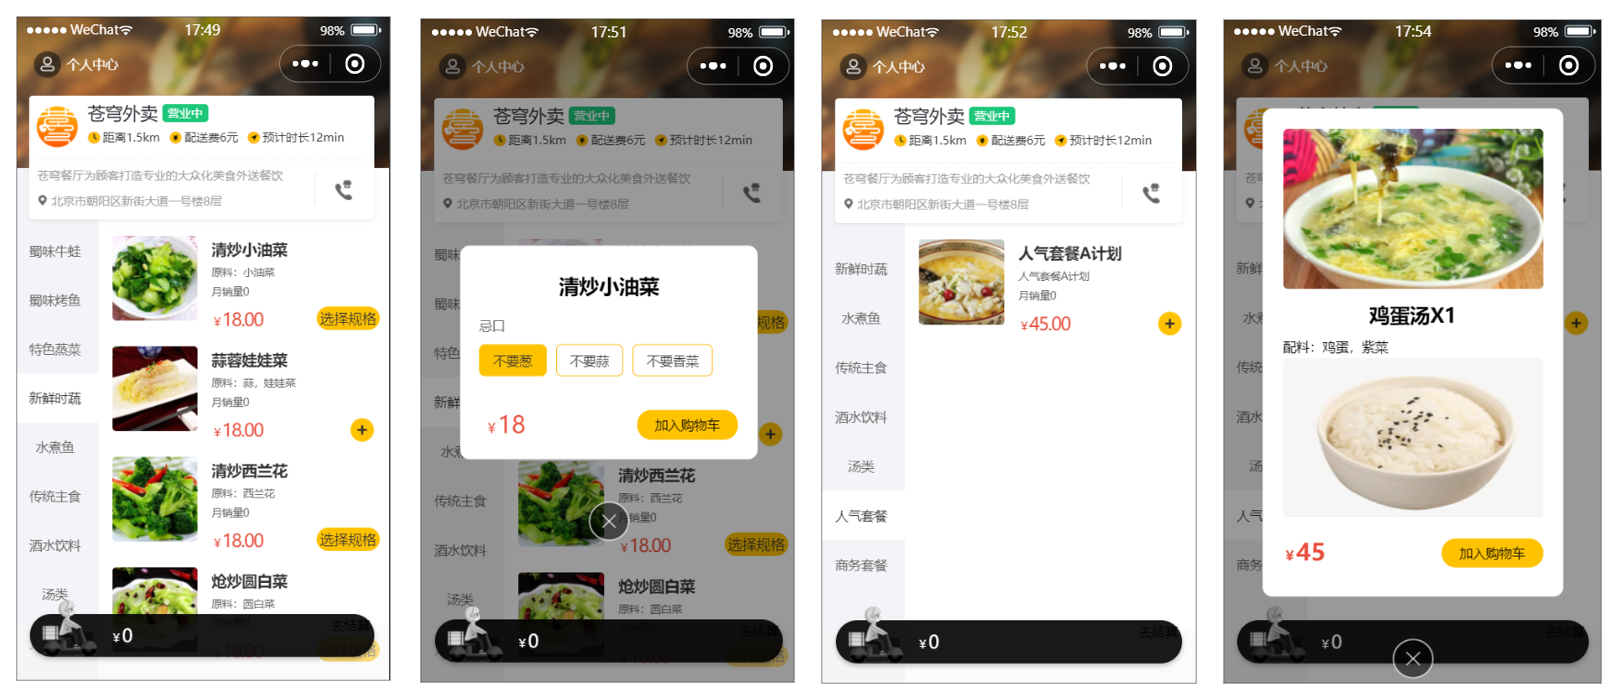
- 产品原型
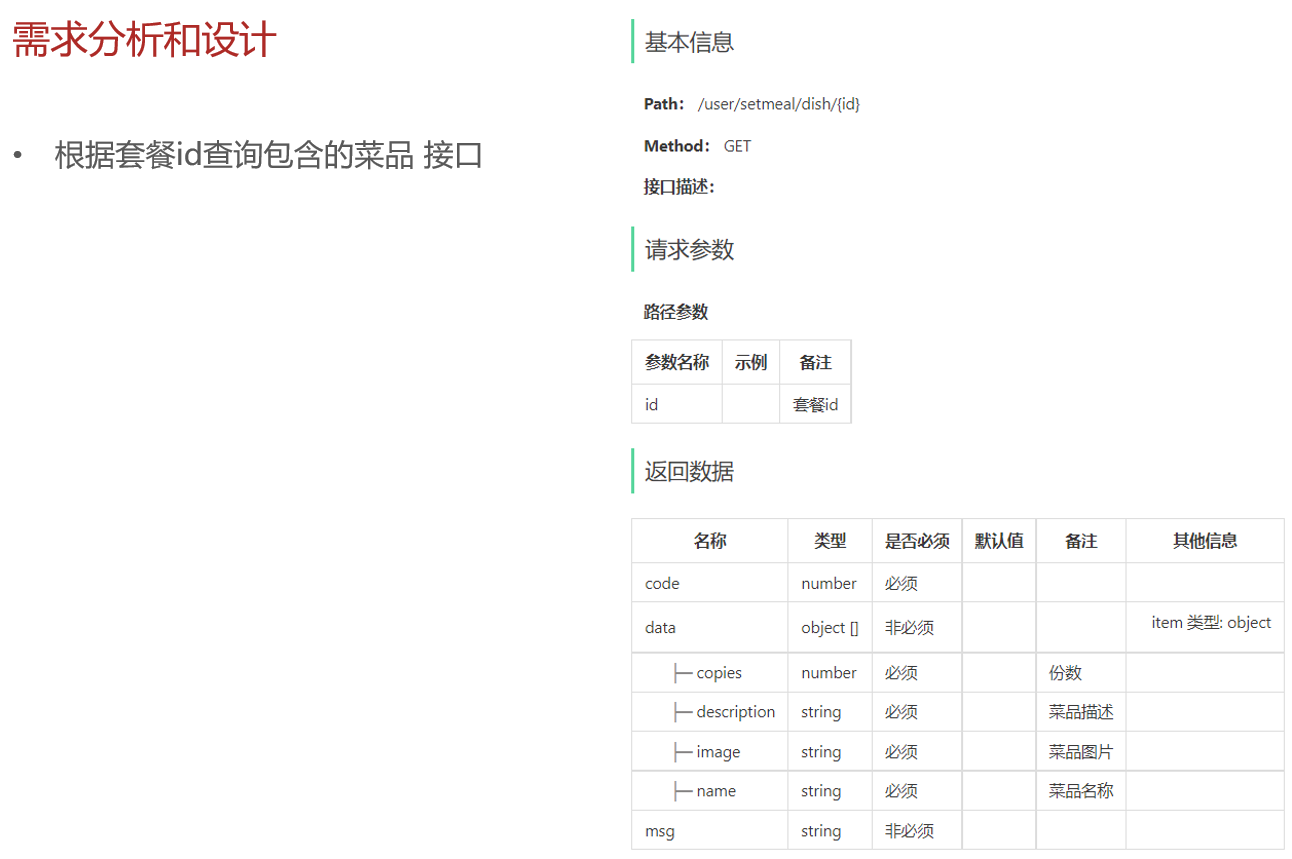
- 接口设计
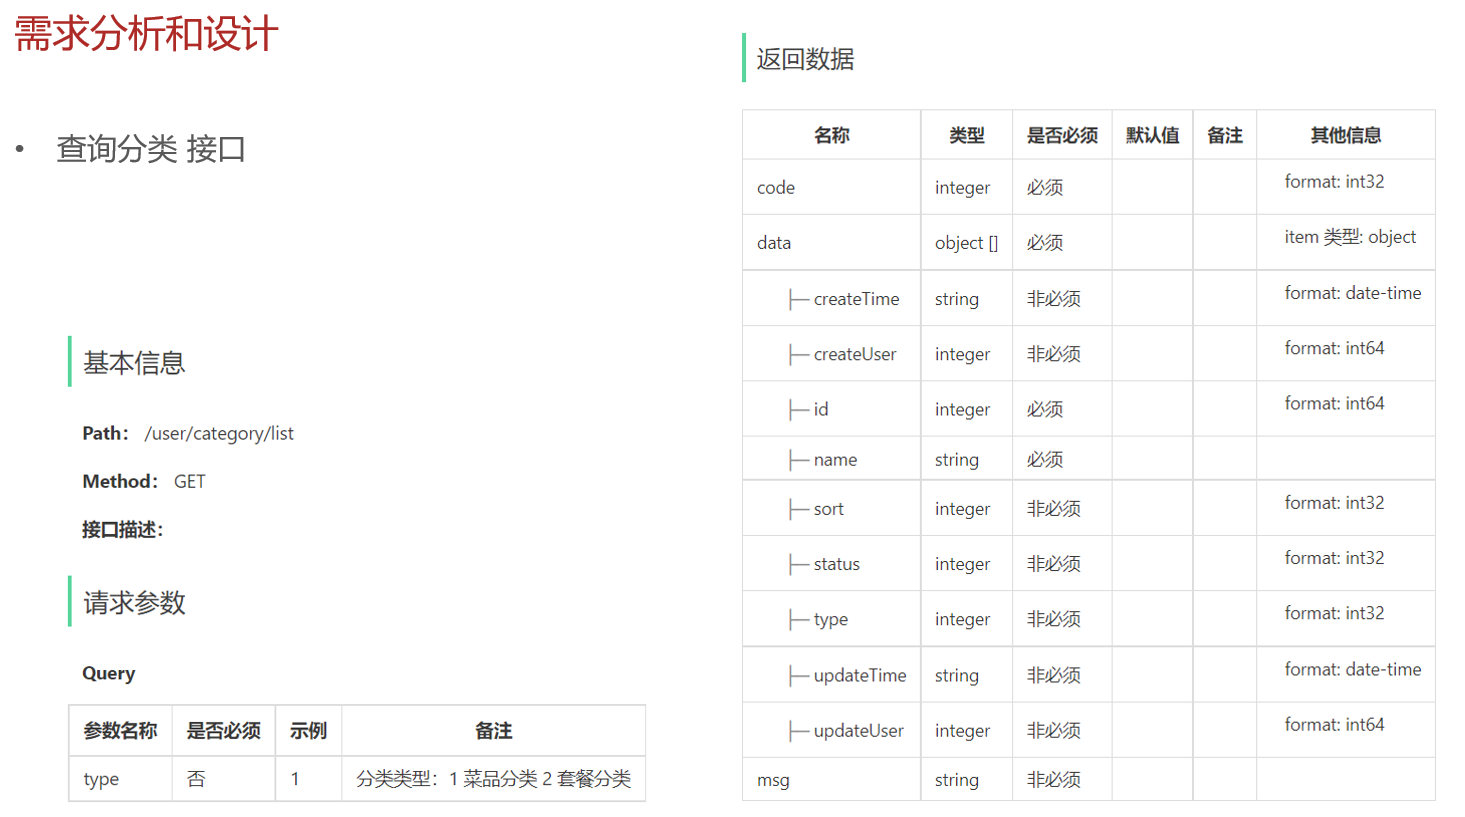
- 查询分类
- 根据分类id查询菜品
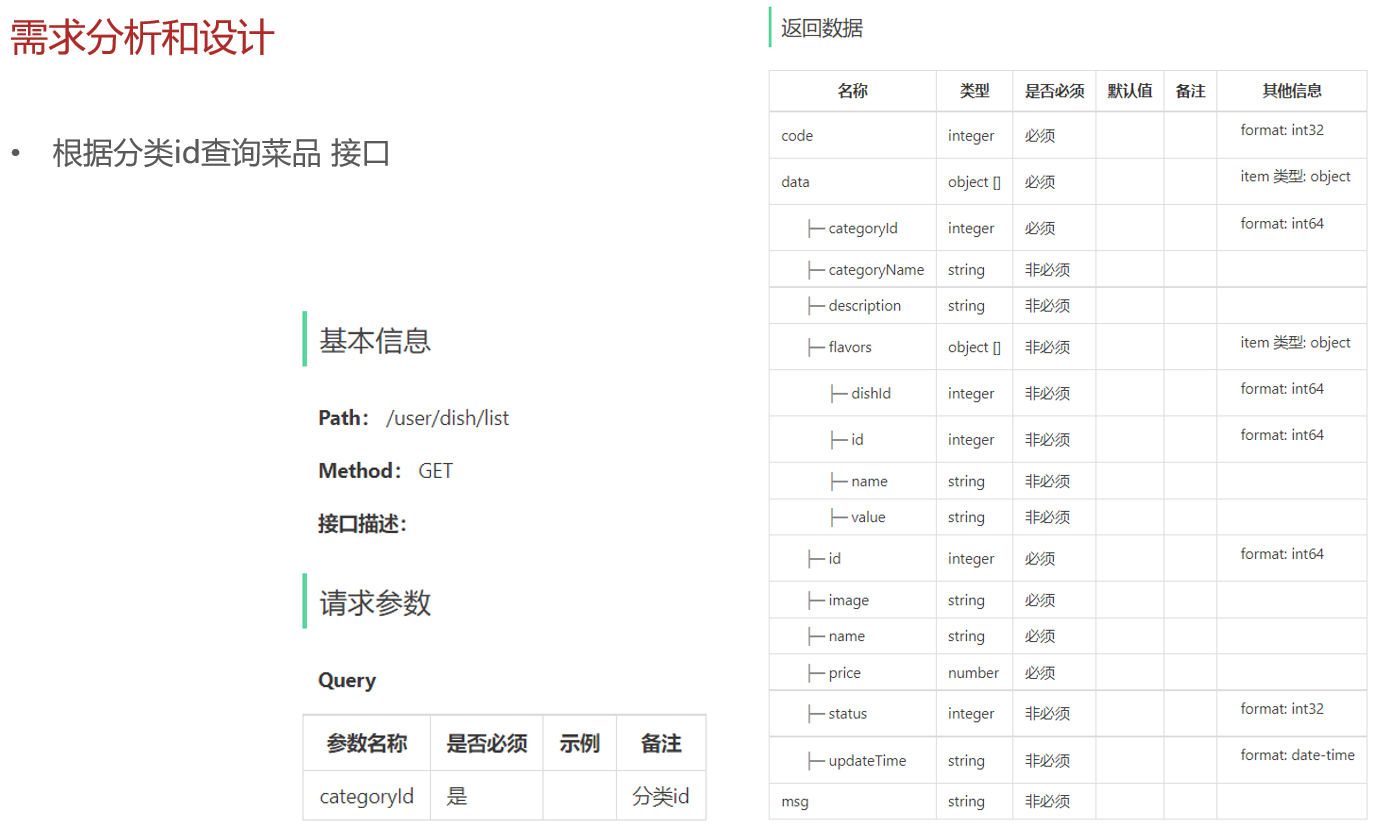
- 根据分类id查询套餐

- 根据套餐id查询包含的菜品
- 查询分类
4.2 商品浏览——代码实现
4.2.1 CategoryController
1 |
|
4.2.2 DishController
1 |
|
4.2.3 DishService
1 | public interface DishService { |
4.2.4 DishServiceImpl
1 |
|
4.2.5 SetmealController
1 |
|
4.2.6 SetmealService
1 | public interface SetmealService { |
4.2.7 SetmealServiceImpl
1 | /** |
4.2.8 SetmealMapper
1 |
|
4.2.9 SetmealMapper.xml
1 |
|
4.3 商品浏览——功能测试
- 测试商品浏览功能: